%22%3E%3Cpath%20d=%22M352.016%20109.322h-18.62v33.317H308.887V31.542h45.54c26.587.0%2042.669%2015.7006%2042.669%2038.4065V70.2514c0%2025.715-20.051%2039.0416-45.051%2039.0416L352.016%20109.322v0zm20.207-38.885C372.223%2059.4847%20364.589%2053.6128%20352.32%2053.6128H333.367V87.5641H352.78c12.27.0%2019.414-7.3081%2019.414-16.8242V70.437H372.223z%22%20fill=%22%23fff%22/%3E%3Cpath%20d=%22M410.776%20142.648V31.542H494.84V53.3001H435.139V75.8497h52.527V97.6078H435.139V120.949h60.494v21.758H410.776V142.648v0z%22%20fill=%22%23fff%22/%3E%3Cpath%20d=%22M582.46%20142.648%20558.588%20107.104H539.331v35.544H514.822V31.542h50.939c26.284.0%2042.032%2013.815%2042.032%2036.6674V68.5123c0%2017.9282-9.702%2029.2128-23.872%2034.4497L611.145%20142.639H582.451L582.46%20142.648zM582.95%2069.4893C582.95%2059.0255%20575.62%2053.603%20563.694%2053.603H539.341V85.5026h24.843C576.12%2085.5026%20582.95%2079.1422%20582.95%2069.8019V69.4991%2069.4893z%22%20fill=%22%23fff%22/%3E%3Cpath%20d=%22M678.058%20145.618c-33.221.0-57.907-25.568-57.907-57.9171V87.3882C620.151%2055.3812%20644.337%2029.1678%20679.048%2029.1678c21.285.0%2034.055%207.0639%2044.54%2017.3616L707.781%2064.6922C699.059%2056.7979%20690.21%2051.9909%20678.891%2051.9909c-19.021.0-32.761%2015.7593-32.761%2035.0652V87.3687c0%2019.3063%2013.397%2035.3683%2032.761%2035.3683C691.788%20122.737%20699.706%20117.588%20708.585%20109.537l15.807%2015.916C712.76%20137.851%20699.863%20145.56%20678.088%20145.56L678.058%20145.618z%22%20fill=%22%23fff%22/%3E%3Cpath%20d=%22M789.963%20145.618c-34.858.0-59.858-25.9-59.858-57.9171V87.3882c0-32.007%2025.333-58.2204%2060.162-58.2204%2034.829.0%2059.858%2025.9007%2059.858%2057.9176V87.398c0%2032.007-25.333%2058.22-60.162%2058.22zm34.212-58.22C824.175%2068.0922%20809.975%2052.03%20789.963%2052.03%20769.952%2052.03%20756.095%2067.7893%20756.095%2087.0951V87.4078C756.095%20106.714%20770.295%20122.776%20790.306%20122.776%20810.318%20122.776%20824.175%20107.017%20824.175%2087.7107V87.398v0z%22%20fill=%22%23fff%22/%3E%3Cpath%20d=%22M985.089%20142.736%201039.93%2029.1678%201094.77%20142.746h-27.5L1039.93%2086.2256l-27.24%2056.5204H985.089V142.736z%22%20fill=%22%23fff%22/%3E%3Cpath%20d=%22M974.936%2031.5811V145.628L891.304%2078.0968V142.551H865.285V29.1678L948.917%2096.4354V31.5811h26.019z%22%20fill=%22%23fff%22/%3E%3C/g%3E%3Cpath%20d=%22M219.315%20146.829c28.718-18.788%2038.114-57.1102%2020.735-87.2301-8.708-15.108-22.784-25.9277-39.624-30.4456-15.602-4.1923-31.898-2.478-46.241%204.7743L134.603.0%2093.9541%2070.4613.0%20233.311H269.206l-49.891-86.482zM195.821%2046.4134c12.241%203.263%2022.427%2011.1294%2028.771%2022.0826%2012.47%2021.5912%205.993%2048.977-14.23%2062.808L163.128%2049.4361c10.176-4.8971%2021.653-5.9652%2032.693-3.0227zM134.603%2035.7593%20238.247%20215.426H177.605L104.268%2088.3409l30.329-52.5762L134.603%2035.7593zM30.9588%20215.426l62.99-109.168L156.939%20215.426H30.9588z%22%20fill=%22url(%23paint0_linear_1391_11470)%22/%3E%3Cpath%20d=%22M306.655%20202.335C306.655%20196.555%20307.958%20191.37%20310.565%20186.78%20313.172%20182.133%20316.713%20178.507%20321.19%20175.9%20325.723%20173.293%20330.738%20171.99%20336.235%20171.99%20342.695%20171.99%20348.333%20173.548%20353.15%20176.665%20357.967%20179.782%20361.48%20184.202%20363.69%20189.925H354.425C352.782%20186.355%20350.402%20183.607%20347.285%20181.68%20344.225%20179.753%20340.542%20178.79%20336.235%20178.79%20332.098%20178.79%20328.387%20179.753%20325.1%20181.68%20321.813%20183.607%20319.235%20186.355%20317.365%20189.925%20315.495%20193.438%20314.56%20197.575%20314.56%20202.335%20314.56%20207.038%20315.495%20211.175%20317.365%20214.745%20319.235%20218.258%20321.813%20220.978%20325.1%20222.905%20328.387%20224.832%20332.098%20225.795%20336.235%20225.795%20340.542%20225.795%20344.225%20224.86%20347.285%20222.99%20350.402%20221.063%20352.782%20218.315%20354.425%20214.745H363.69C361.48%20220.412%20357.967%20224.803%20353.15%20227.92%20348.333%20230.98%20342.695%20232.51%20336.235%20232.51%20330.738%20232.51%20325.723%20231.235%20321.19%20228.685%20316.713%20226.078%20313.172%20222.48%20310.565%20217.89%20307.958%20213.3%20306.655%20208.115%20306.655%20202.335zm130.259%2030.26C431.418%20232.595%20426.403%20231.32%20421.869%20228.77%20417.336%20226.163%20413.738%20222.565%20411.074%20217.975%20408.468%20213.328%20407.164%20208.115%20407.164%20202.335S408.468%20191.37%20411.074%20186.78C413.738%20182.133%20417.336%20178.535%20421.869%20175.985%20426.403%20173.378%20431.418%20172.075%20436.914%20172.075%20442.468%20172.075%20447.511%20173.378%20452.044%20175.985%20456.578%20178.535%20460.148%20182.105%20462.754%20186.695%20465.361%20191.285%20466.664%20196.498%20466.664%20202.335%20466.664%20208.172%20465.361%20213.385%20462.754%20217.975%20460.148%20222.565%20456.578%20226.163%20452.044%20228.77%20447.511%20231.32%20442.468%20232.595%20436.914%20232.595zm0-6.715C441.051%20225.88%20444.763%20224.917%20448.049%20222.99%20451.393%20221.063%20453.999%20218.315%20455.869%20214.745%20457.796%20211.175%20458.759%20207.038%20458.759%20202.335%20458.759%20197.575%20457.796%20193.438%20455.869%20189.925%20453.999%20186.355%20451.421%20183.607%20448.134%20181.68%20444.848%20179.753%20441.108%20178.79%20436.914%20178.79%20432.721%20178.79%20428.981%20179.753%20425.694%20181.68%20422.408%20183.607%20419.801%20186.355%20417.874%20189.925%20416.004%20193.438%20415.069%20197.575%20415.069%20202.335%20415.069%20207.038%20416.004%20211.175%20417.874%20214.745%20419.801%20218.315%20422.408%20221.063%20425.694%20222.99%20429.038%20224.917%20432.778%20225.88%20436.914%20225.88zm134.906-52.7V232H564.085V188.14L544.535%20232H539.095L519.46%20188.055V232H511.725V173.18H520.055L541.815%20221.8l21.76-48.62H571.82zm108.063.0V232H672.148V188.14L652.598%20232H647.158l-19.635-43.945V232H619.788V173.18H628.118l21.76%2048.62%2021.76-48.62H679.883zM735.416%20172.755V210.24C735.416%20215.51%20736.691%20219.42%20739.241%20221.97%20741.848%20224.52%20745.446%20225.795%20750.036%20225.795%20754.57%20225.795%20758.111%20224.52%20760.661%20221.97%20763.268%20219.42%20764.571%20215.51%20764.571%20210.24V172.755H772.306v37.4C772.306%20215.085%20771.315%20219.25%20769.331%20222.65%20767.348%20225.993%20764.656%20228.487%20761.256%20230.13%20757.913%20231.773%20754.145%20232.595%20749.951%20232.595%20745.758%20232.595%20741.961%20231.773%20738.561%20230.13%20735.218%20228.487%20732.555%20225.993%20730.571%20222.65%20728.645%20219.25%20727.681%20215.085%20727.681%20210.155v-37.4H735.416zM866.64%20232H858.905l-31.11-47.175V232H820.06V172.67H827.795l31.11%2047.09V172.67H866.64V232zm55.77-59.245V232H914.675V172.755H922.41zm84.5.0V179.045H990.758V232H983.023V179.045H966.788V172.755h40.122zm85.85.0-19.3%2036.89V232H1065.73V209.645L1046.35%20172.755H1054.93L1069.55%20202.76%201084.17%20172.755H1092.76z%22%20fill=%22%23fff%22/%3E%3Cdefs%3E%3ClinearGradient%20id=%22paint0_linear_1391_11470%22%20x1=%2230.363%22%20y1=%22238.463%22%20x2=%22230.327%22%20y2=%2238.6685%22%20gradientUnits=%22userSpaceOnUse%22%3E%3Cstop%20stop-color=%22%23FC3519%22/%3E%3Cstop%20offset=%221%22%20stop-color=%22%23F0D136%22/%3E%3C/linearGradient%3E%3CclipPath%20id=%22clip0_1391_11470%22%3E%3Crect%20width=%22962.614%22%20height=%22116.656%22%20fill=%22%23fff%22%20transform=%22translate(132.155%2028.9724)%22/%3E%3C/clipPath%3E%3C/defs%3E%3C/svg%3E)
We’ll deploy a demo application into the Kubernetes cluster using ArgoCD to simulate load on the PostgreSQL cluster.
This is a series of articles, in previous parts we:
- Part 1 - Prepared the environment and installed ArgoCD and GitHub repository.
- Part 2 - Installed Percona Operator for Postgres and created a Postgres cluster.
The application is a custom Go-based service that generates traffic for PostgreSQL, MongoDB, or MySQL.
It uses a dataset of GitHub repositories and pull requests, and mimics real-world operations like fetching, creating, updating, and deleting records.
Load intensity is configurable through a browser-based control panel.
We’ll install it using Helm, tracked and deployed via ArgoCD.
Reference repository: github-stat
Create the ArgoCD Application Manifest
Create a file named argocd-demo-app.yaml in the apps/ directory.
apiVersion: argoproj.io/v1alpha1
kind: Application
metadata:
  name: demo-app
  namespace: argocd
spec:
  project: default
  source:
    repoURL: https://github.com/dbazhenov/github-stat
    targetRevision: main
    path: k8s/helm
  destination:
    server: https://kubernetes.default.svc
    namespace: demo-app
  syncPolicy:
    automated:
      prune: true
      selfHeal: true
    syncOptions:
      - CreateNamespace=true
This will install the Helm chart fromhttps://github.com/dbazhenov/github-stat/tree/main/k8s/helm
By default, the service is configured as LoadBalancer, making it accessible from the internet.
To switch to NodePort (if needed), override the Helm value:
source:
  helm:
    parameters:
      - name: controlPanelService.type
        value: NodePort
We’ll keep default settings in this example.
Push the Application Manifest to GitHub
Track and commit your changes:
git statusgit add .git commit -m "Installing Demo Application in ArgoCD by HELM"git push origin main Expected Git output:
➜  percona-argocd-pg-coroot git:(main) git status
On branch main
Your branch is up to date with 'origin/main'.

Untracked files:
  (use "git add <file>..." to include in what will be committed)
    apps/argocd-demo-app.yaml

nothing added to commit but untracked files present (use "git add" to track)
➜  percona-argocd-pg-coroot git:(main) ✗ git add .
➜  percona-argocd-pg-coroot git:(main) ✗ git commit -m "Installing Demo Application in ArgoCD by HELM"
[main 03ce175] Installing Demo Application in ArgoCD by HELM
 1 file changed, 20 insertions(+)
 create mode 100644 apps/argocd-demo-app.yaml
➜  percona-argocd-pg-coroot git:(main) git push origin main
Enumerating objects: 6, done.
Counting objects: 100% (6/6), done.
Delta compression using up to 10 threads
Compressing objects: 100% (4/4), done.
Writing objects: 100% (4/4), 686 bytes | 686.00 KiB/s, done.
Total 4 (delta 0), reused 0 (delta 0), pack-reused 0
To github.com:dbazhenov/percona-argocd-pg-coroot.git
   6b2dc98..03ce175  main -> main
➜  percona-argocd-pg-coroot git:(main)
Apply the ArgoCD Application
Deploy the app via:
kubectl apply -f apps/argocd-demo-app.yaml -n argocdArgoCD will install the app and has started tracking the app’s HELM chart
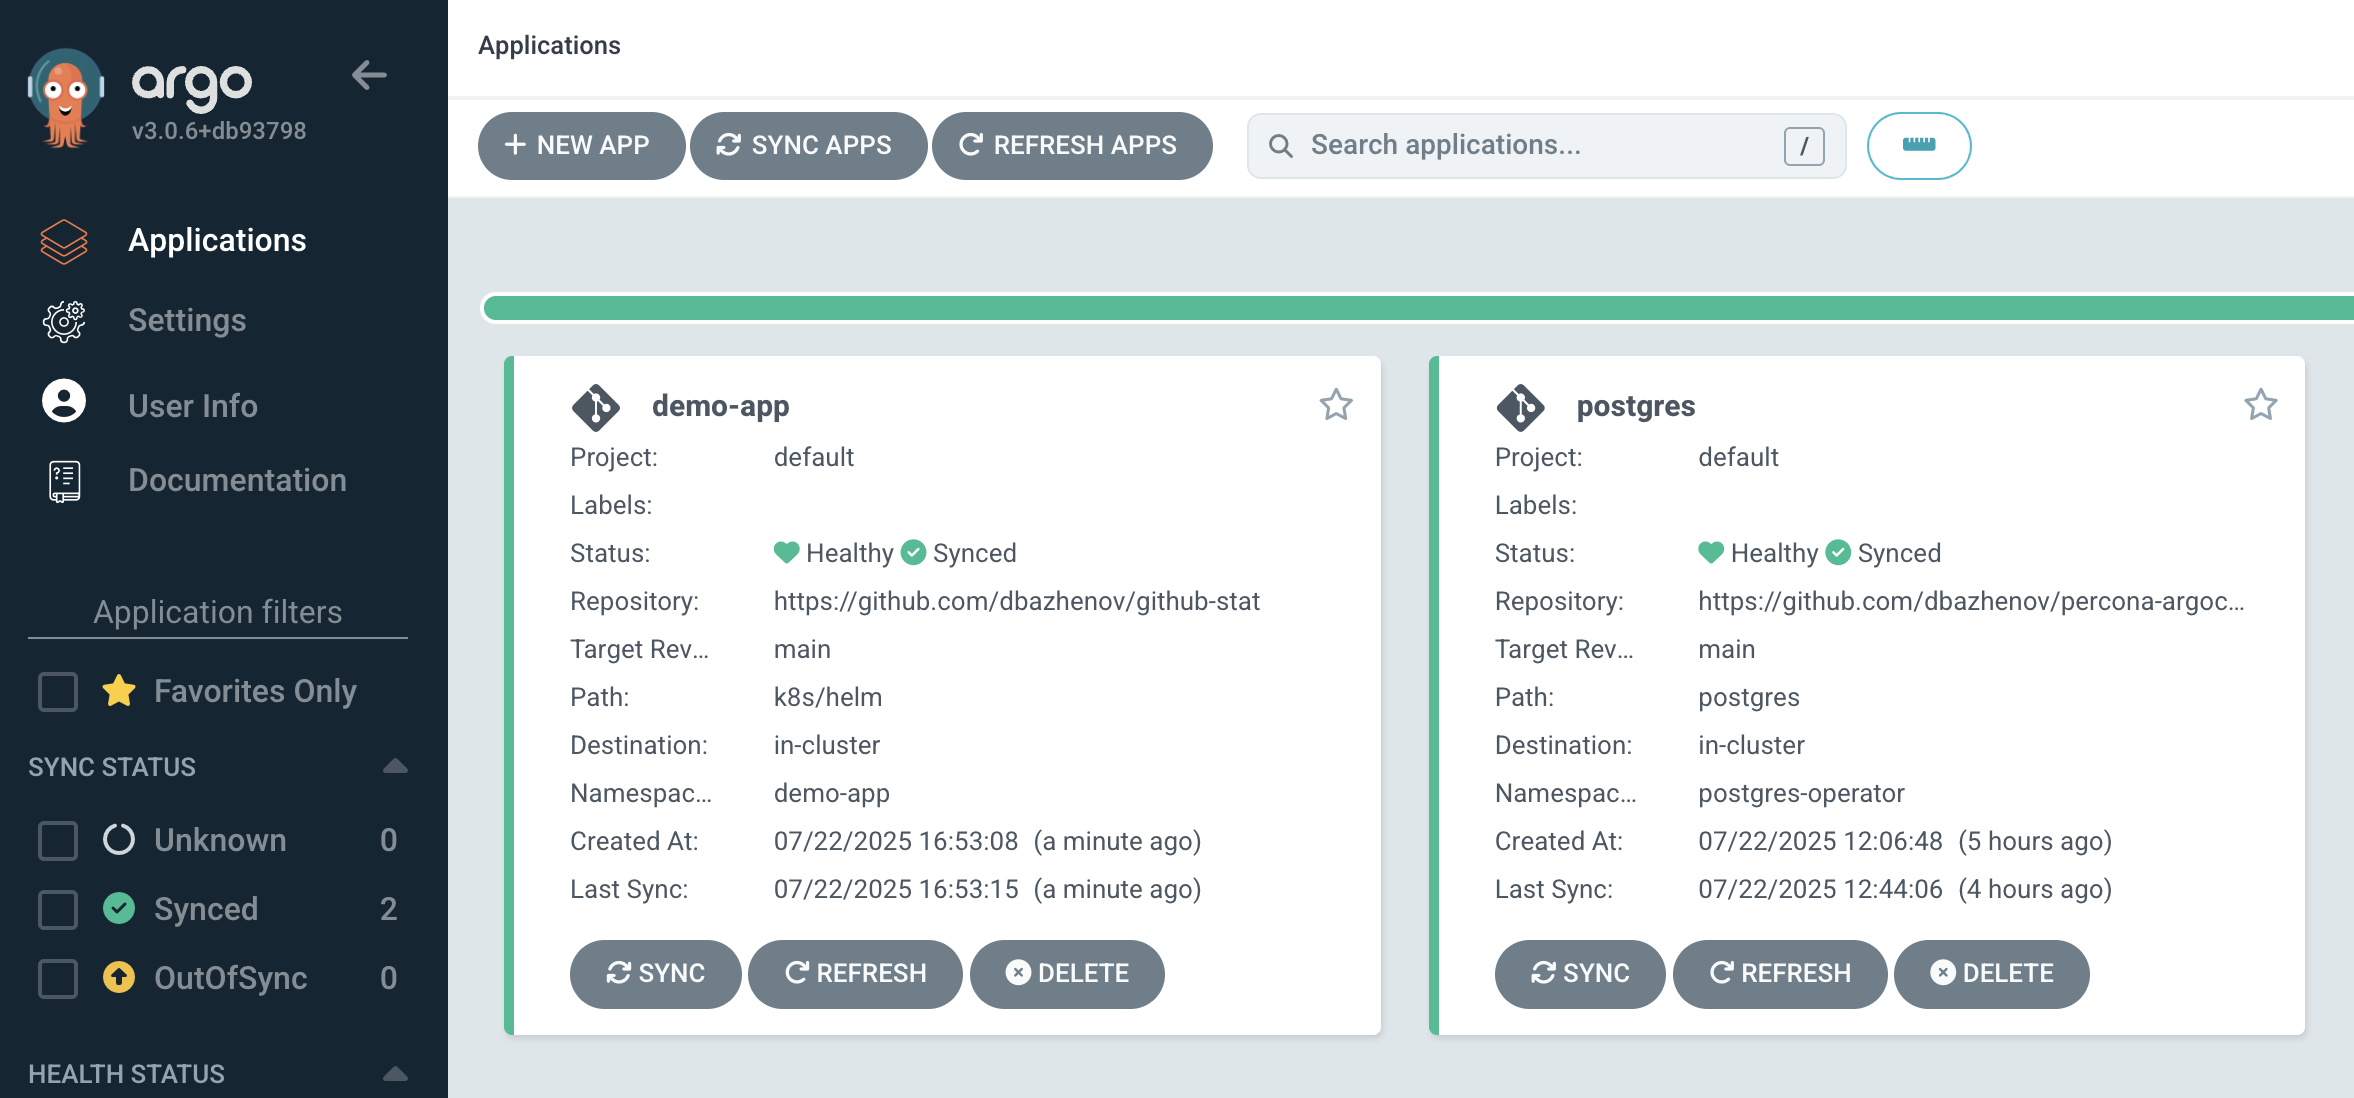
Validate the Deployment
Confirm the app status in ArgoCD UI:
Check running pods:
kubectl get pods -n demo-appExpected pods:
➜  percona-argocd-pg-coroot git:(main) kubectl get pods -n demo-app
NAME                               READY   STATUS    RESTARTS   AGE
demo-app-dataset-6d886f67-j648w    1/1     Running   0          2m52s
demo-app-load-577cff97c9-d8j99     1/1     Running   0          2m52s
demo-app-valkey-74989c9bf7-gjp4x   1/1     Running   0          2m52s
demo-app-web-5b98d4c65c-xmkq9 1/1 Running 0 2m52s- demo-app-dataset - loads dataset
- demo-app-load - generates traffic
- demo-app-valkey - Redis-compatible DB backend
- demo-app-web - UI dashboard
Open the Application Dashboard
Retrieve the external IP:
kubectl get svc -n demo-appFind the EXTERNAL-IP of demo-app-web-service.
Sample output:
➜  percona-argocd-pg-coroot git:(main) kubectl get svc -n demo-app
NAME                      TYPE           CLUSTER-IP       EXTERNAL-IP     PORT(S)        AGE
demo-app-valkey-service   ClusterIP      34.118.235.203   <none>          6379/TCP       4m59s
demo-app-web-service      LoadBalancer   34.118.232.144   34.28.221.107   80:31308/TCP   4m59s
Access the app in your browser:
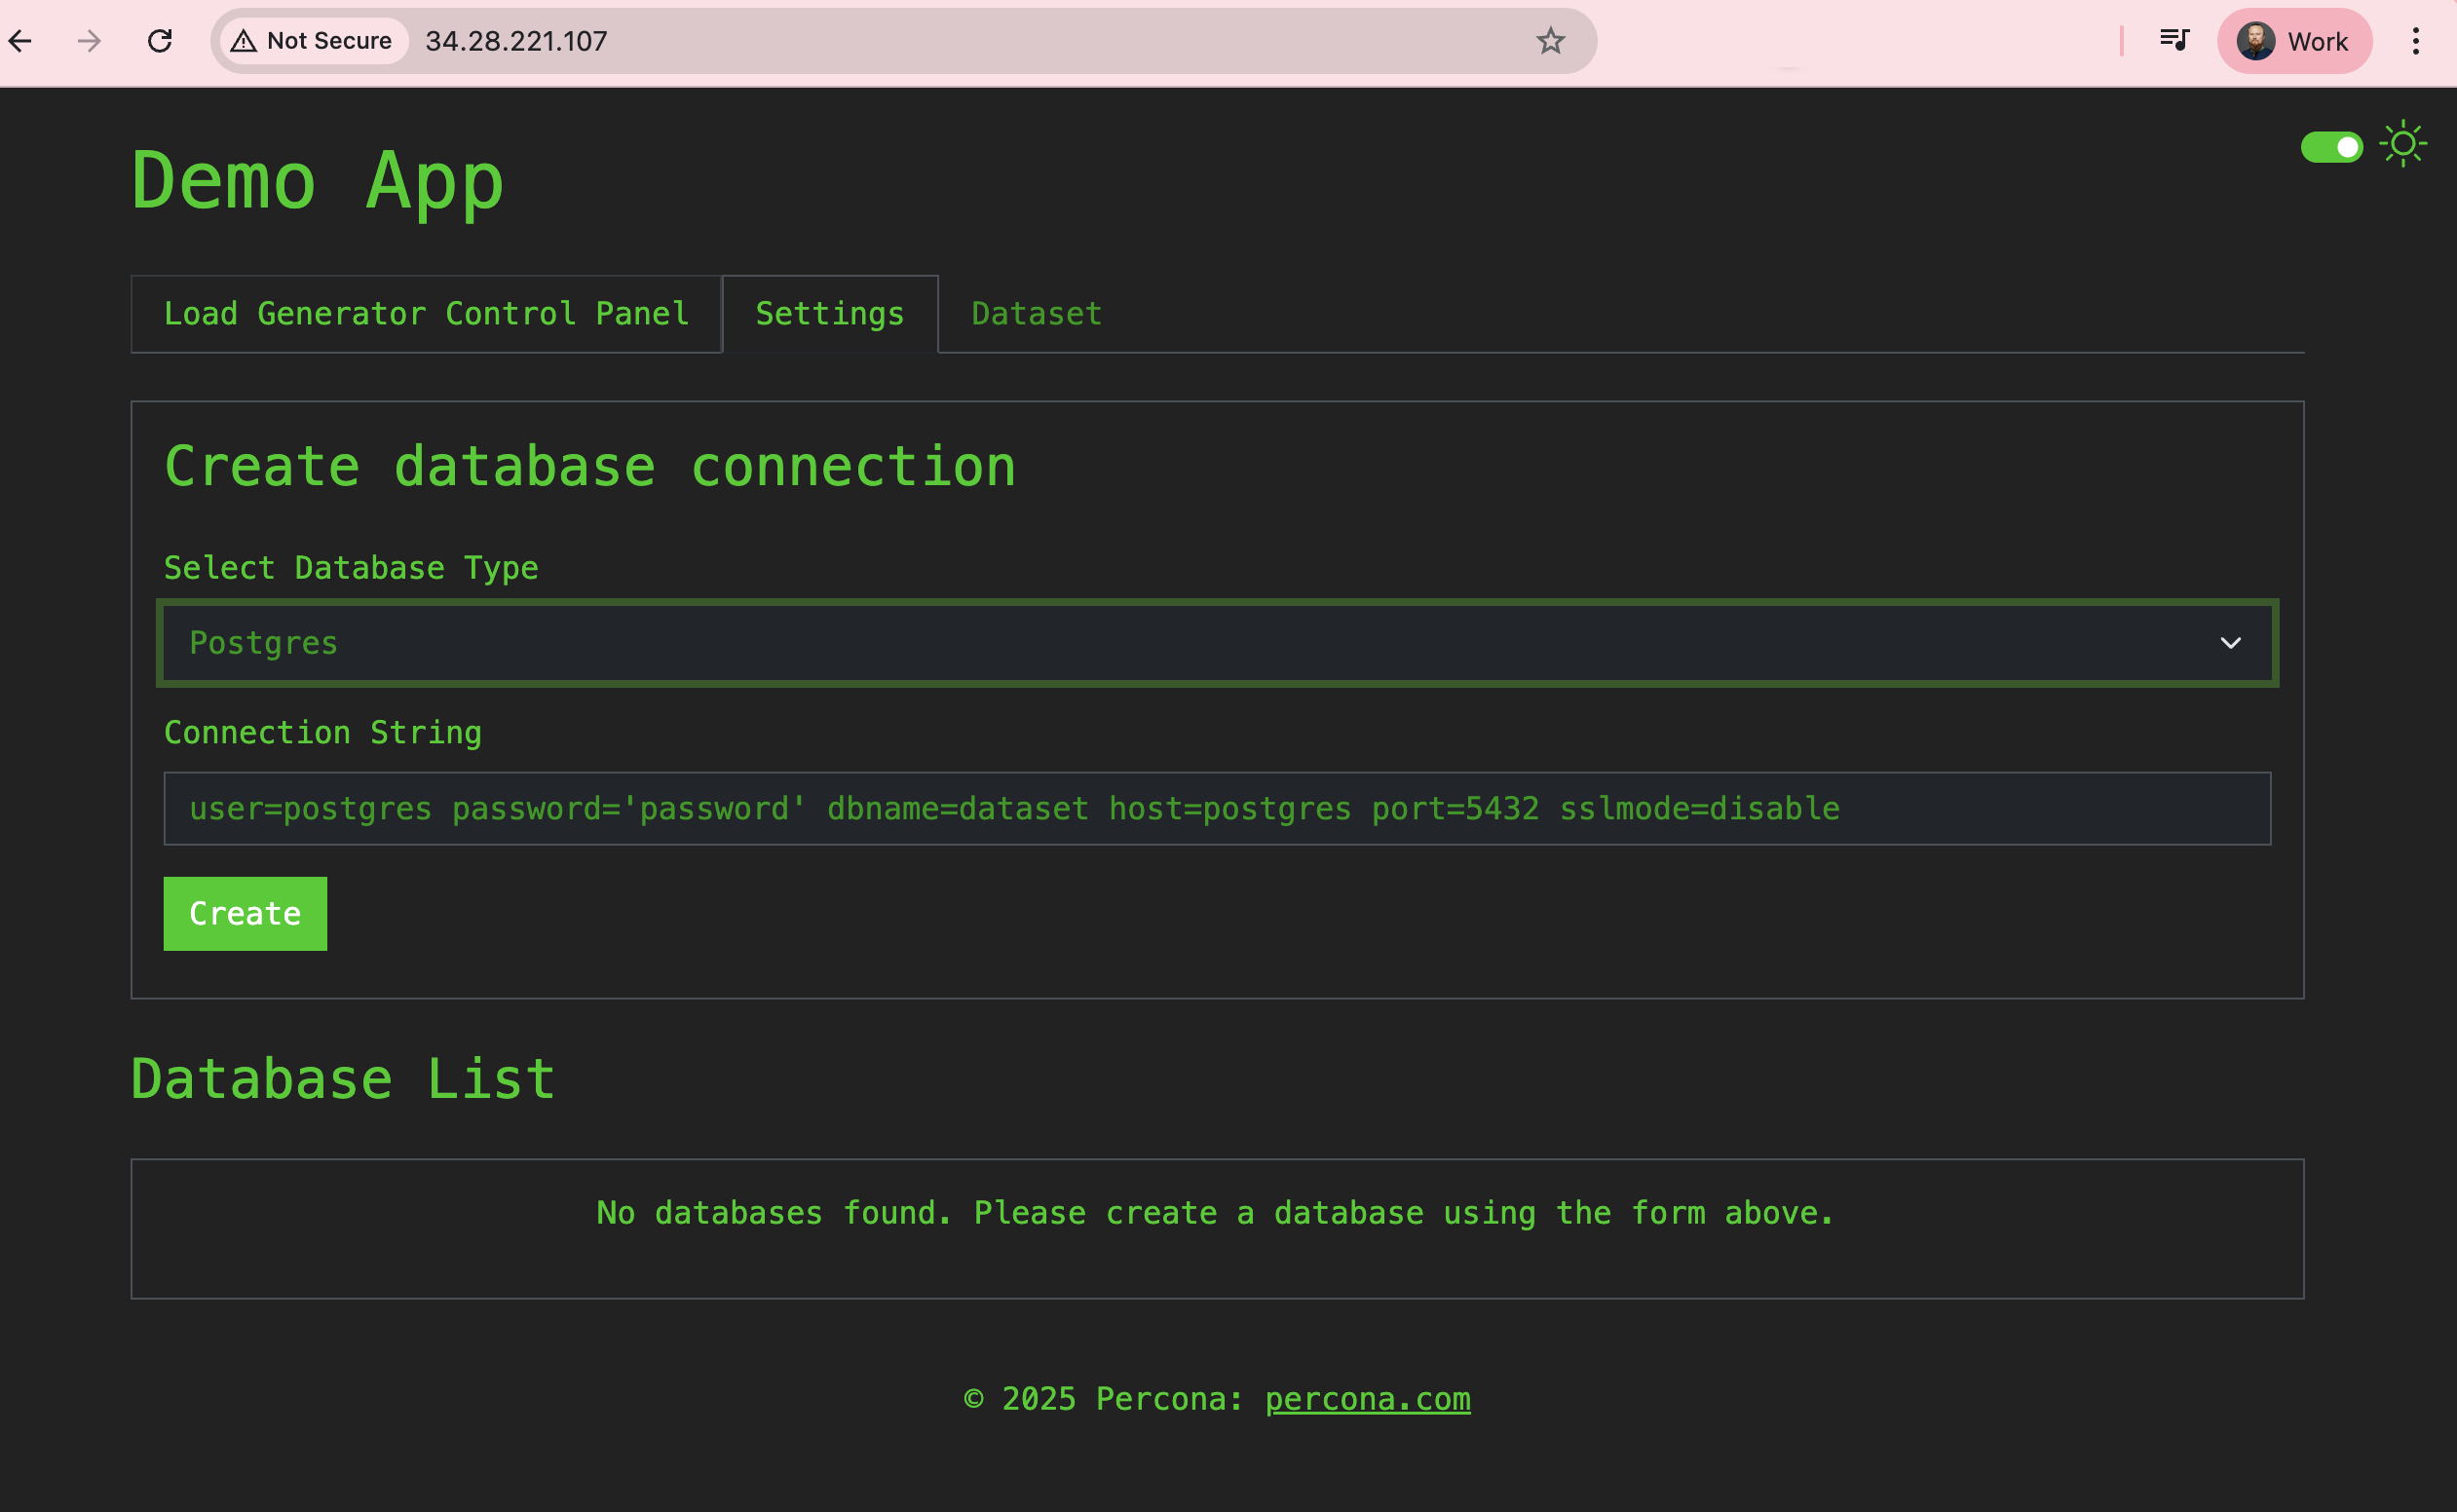
Navigate to the Settings tab to configure a PostgreSQL connection.
PostgreSQL Credentials Setup
Percona Operator has already (Application and system users):
- Created schema and database
cluster1 - Created user
cluster1 - Stored credentials in
cluster1-pguser-cluster1secret
Extract the password:
kubectl get secret cluster1-pguser-cluster1 -n postgres-operator --template='{{.data.password | base64decode}}{{"\n"}}'Let’s connect to the database from the Demo application using the given user and cluster1-pgbouncer.postgres-operator.svc host
In the Connection String field enter
user=cluster1 password='[PASSWORD]' dbname=cluster1 host=cluster1-pgbouncer.postgres-operator.svc port=5432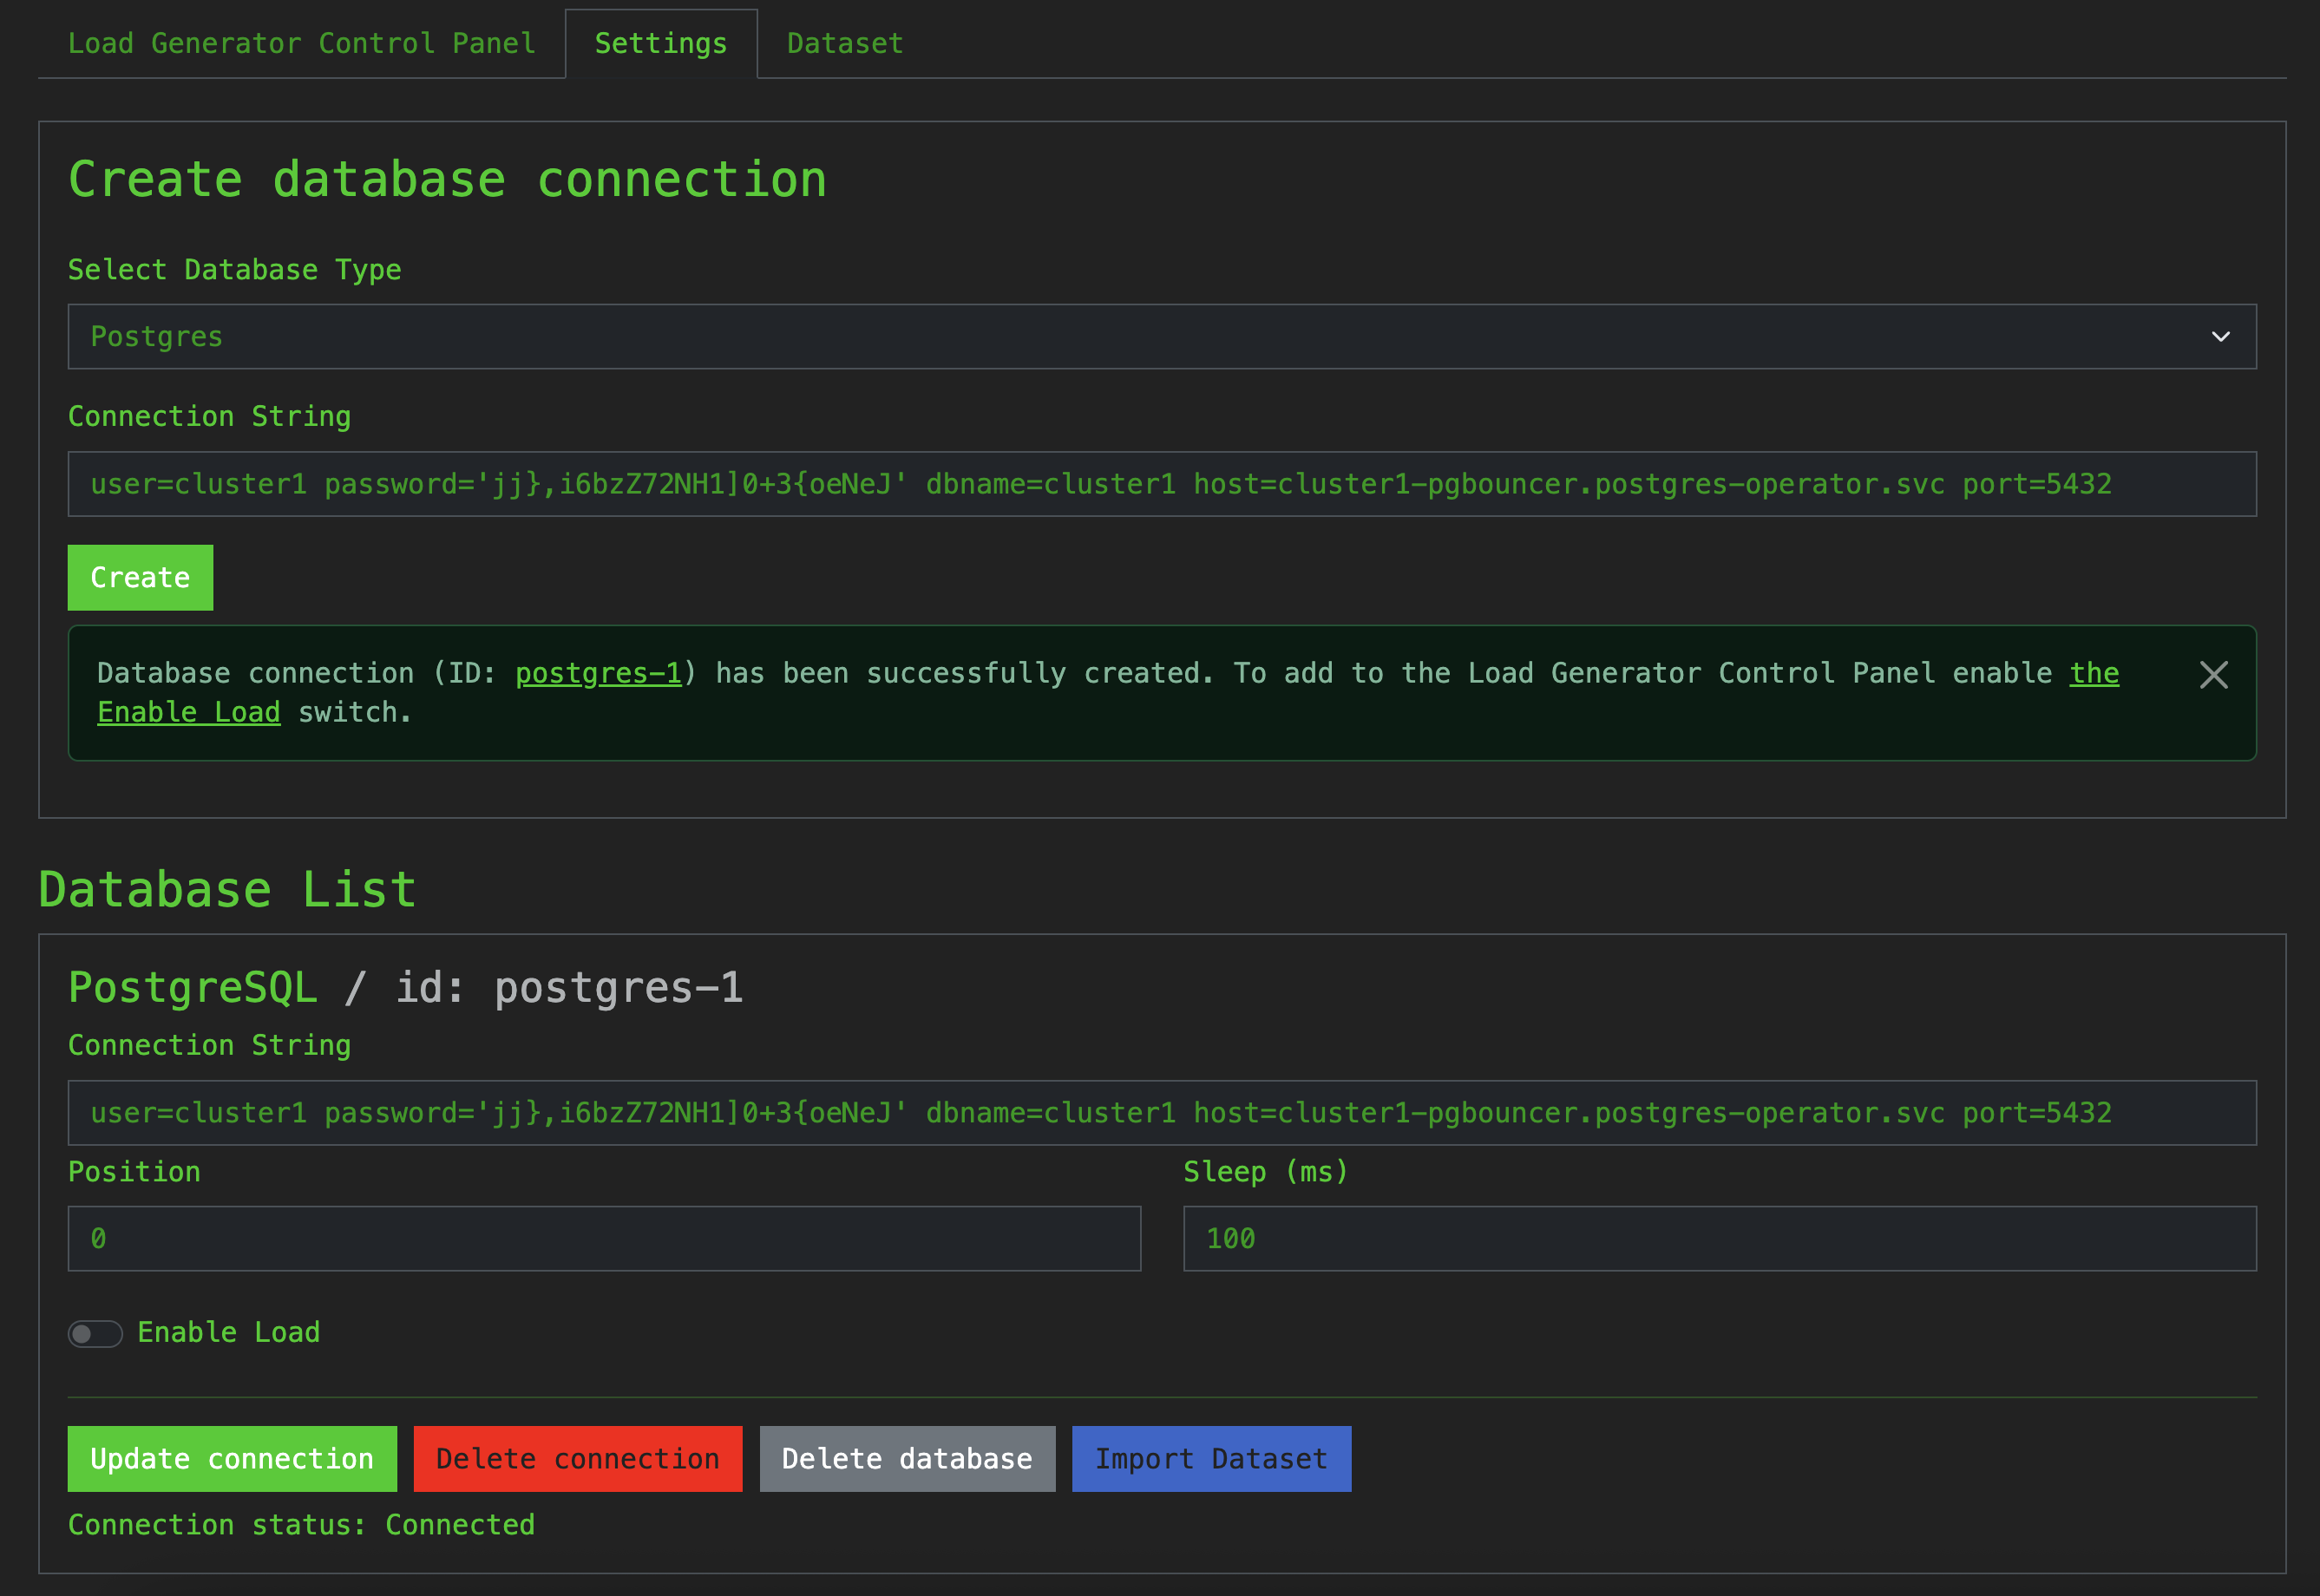
The connection has been successfully created, this is good.
To start generating the load, we need to import the Dataset using the Import Dataset button.
Dataset Import Error: Create Schema Denied
During import, the app tries to create a schema.
By default, pgBouncer limits user privileges, preventing this action.
Percona documentation suggests enabling proxy.pgBouncer.exposeSuperusers and creating a privileged user.
We’ll handle this via GitOps. It seems cool that we’ll be doing this with tracking in Git, as these are important settings and we shouldn’t forget about them and turn them off in the future.
Define a New PostgreSQL User
We will make changes to postgres/cr.yaml that will add a new user and also enable the proxy.pgBouncer.exposeSuperusers option.
In the postgres/cr.yaml file I found the users section, uncommented and added my user data.
In postgres/cr.yaml, add:
  users:
    - name: daniil
      databases:
        - demo
      options: "SUPERUSER"
      password:
        type: ASCII
      secretName: "daniil-credentials"
Note: In production, use scoped permissions like "LOGIN CREATE CREATEDB" rather than SUPERUSER.
I also found the proxy.pgBouncer.exposeSuperusers setting and set it to true
Update pgBouncer config:
  proxy:
    pgBouncer:
      replicas: 3
      image: docker.io/percona/percona-pgbouncer:1.24.1
      exposeSuperusers: true
Commit and push:
git statusgit add .git commit -m "Postgres cluster: Creating a new user and pgBouncer.exposeSuperusers"git push origin mainAfter a couple of minutes, ArgoCD will synchronize the changes and Percona Operator will create the user and change the configuration.
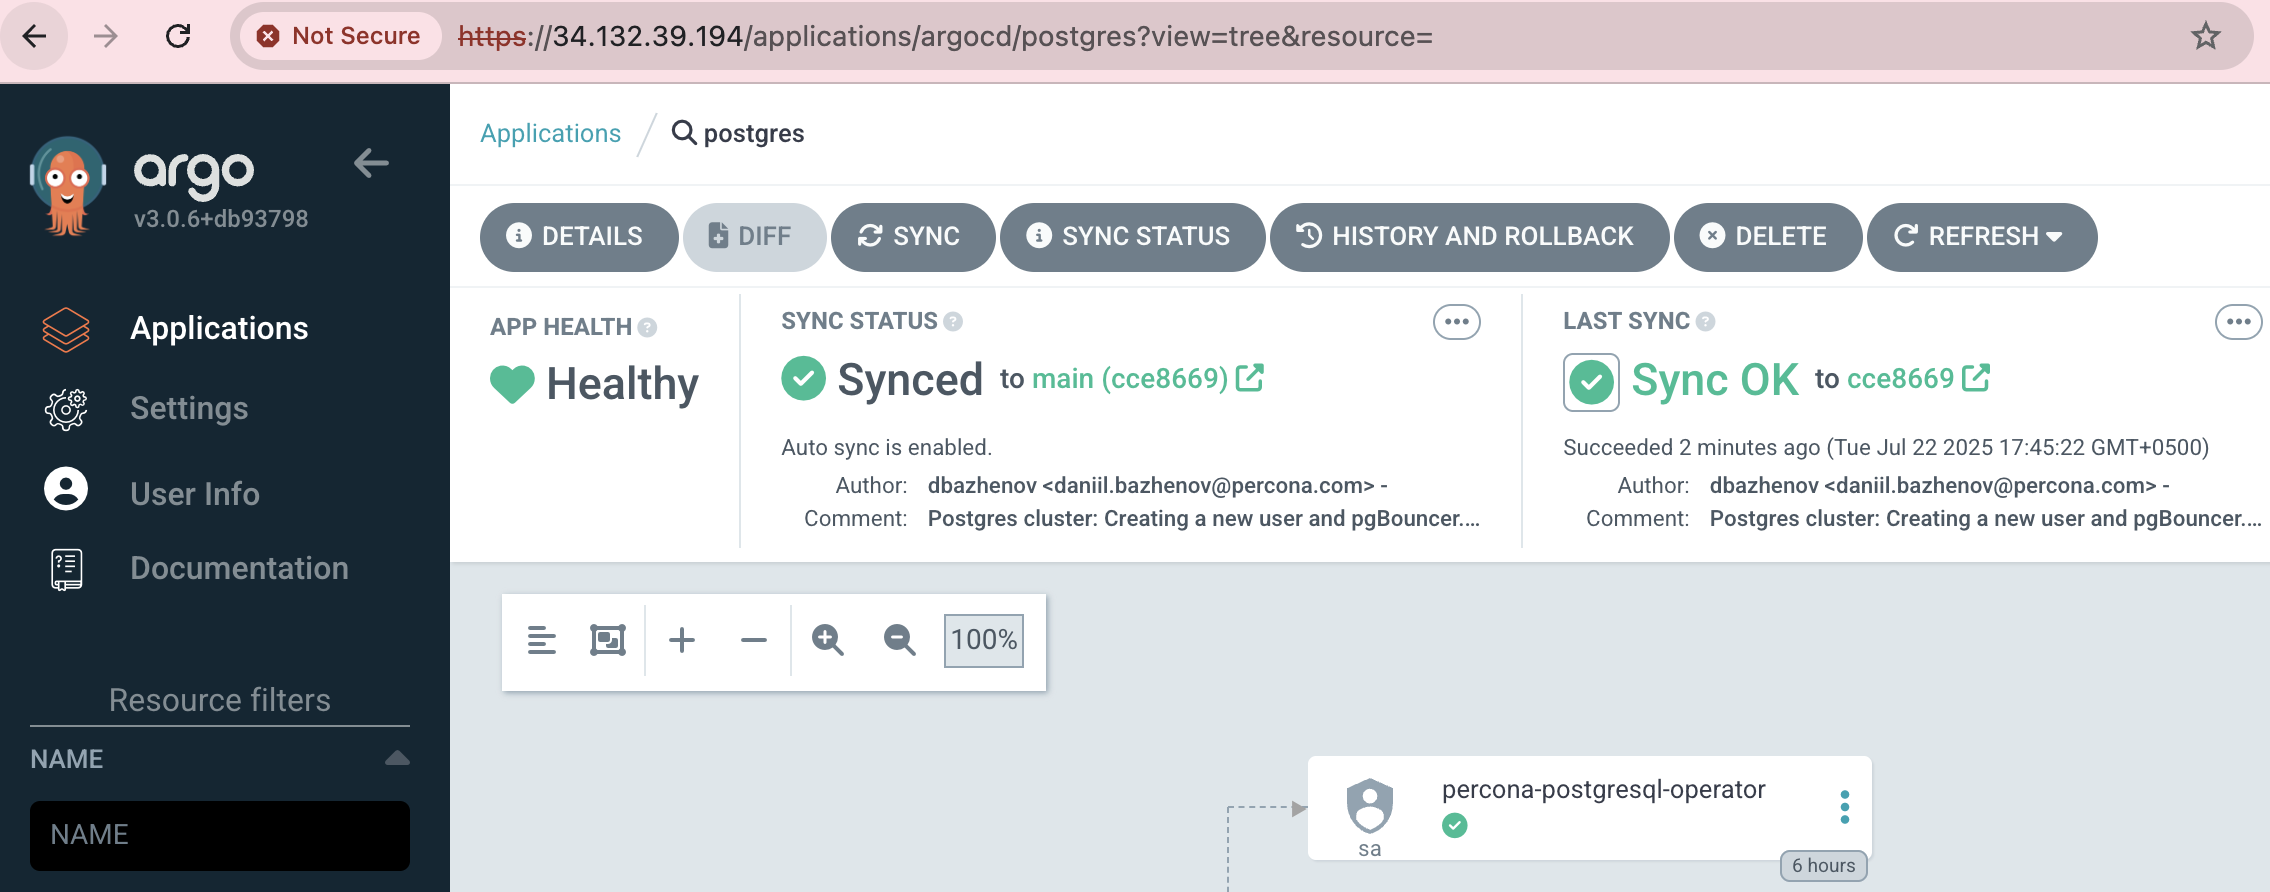
Connect With the New User
Get the password:
kubectl get secret daniil-credentials -n postgres-operator --template='{{.data.password | base64decode}}{{"\n"}}'Let’s replace Connection String in Demo application, I got the following string
user=daniil password='iKj:e[wT3*g]OF5+f' dbname=dataset host=cluster1-pgbouncer.postgres-operator.svc port=5432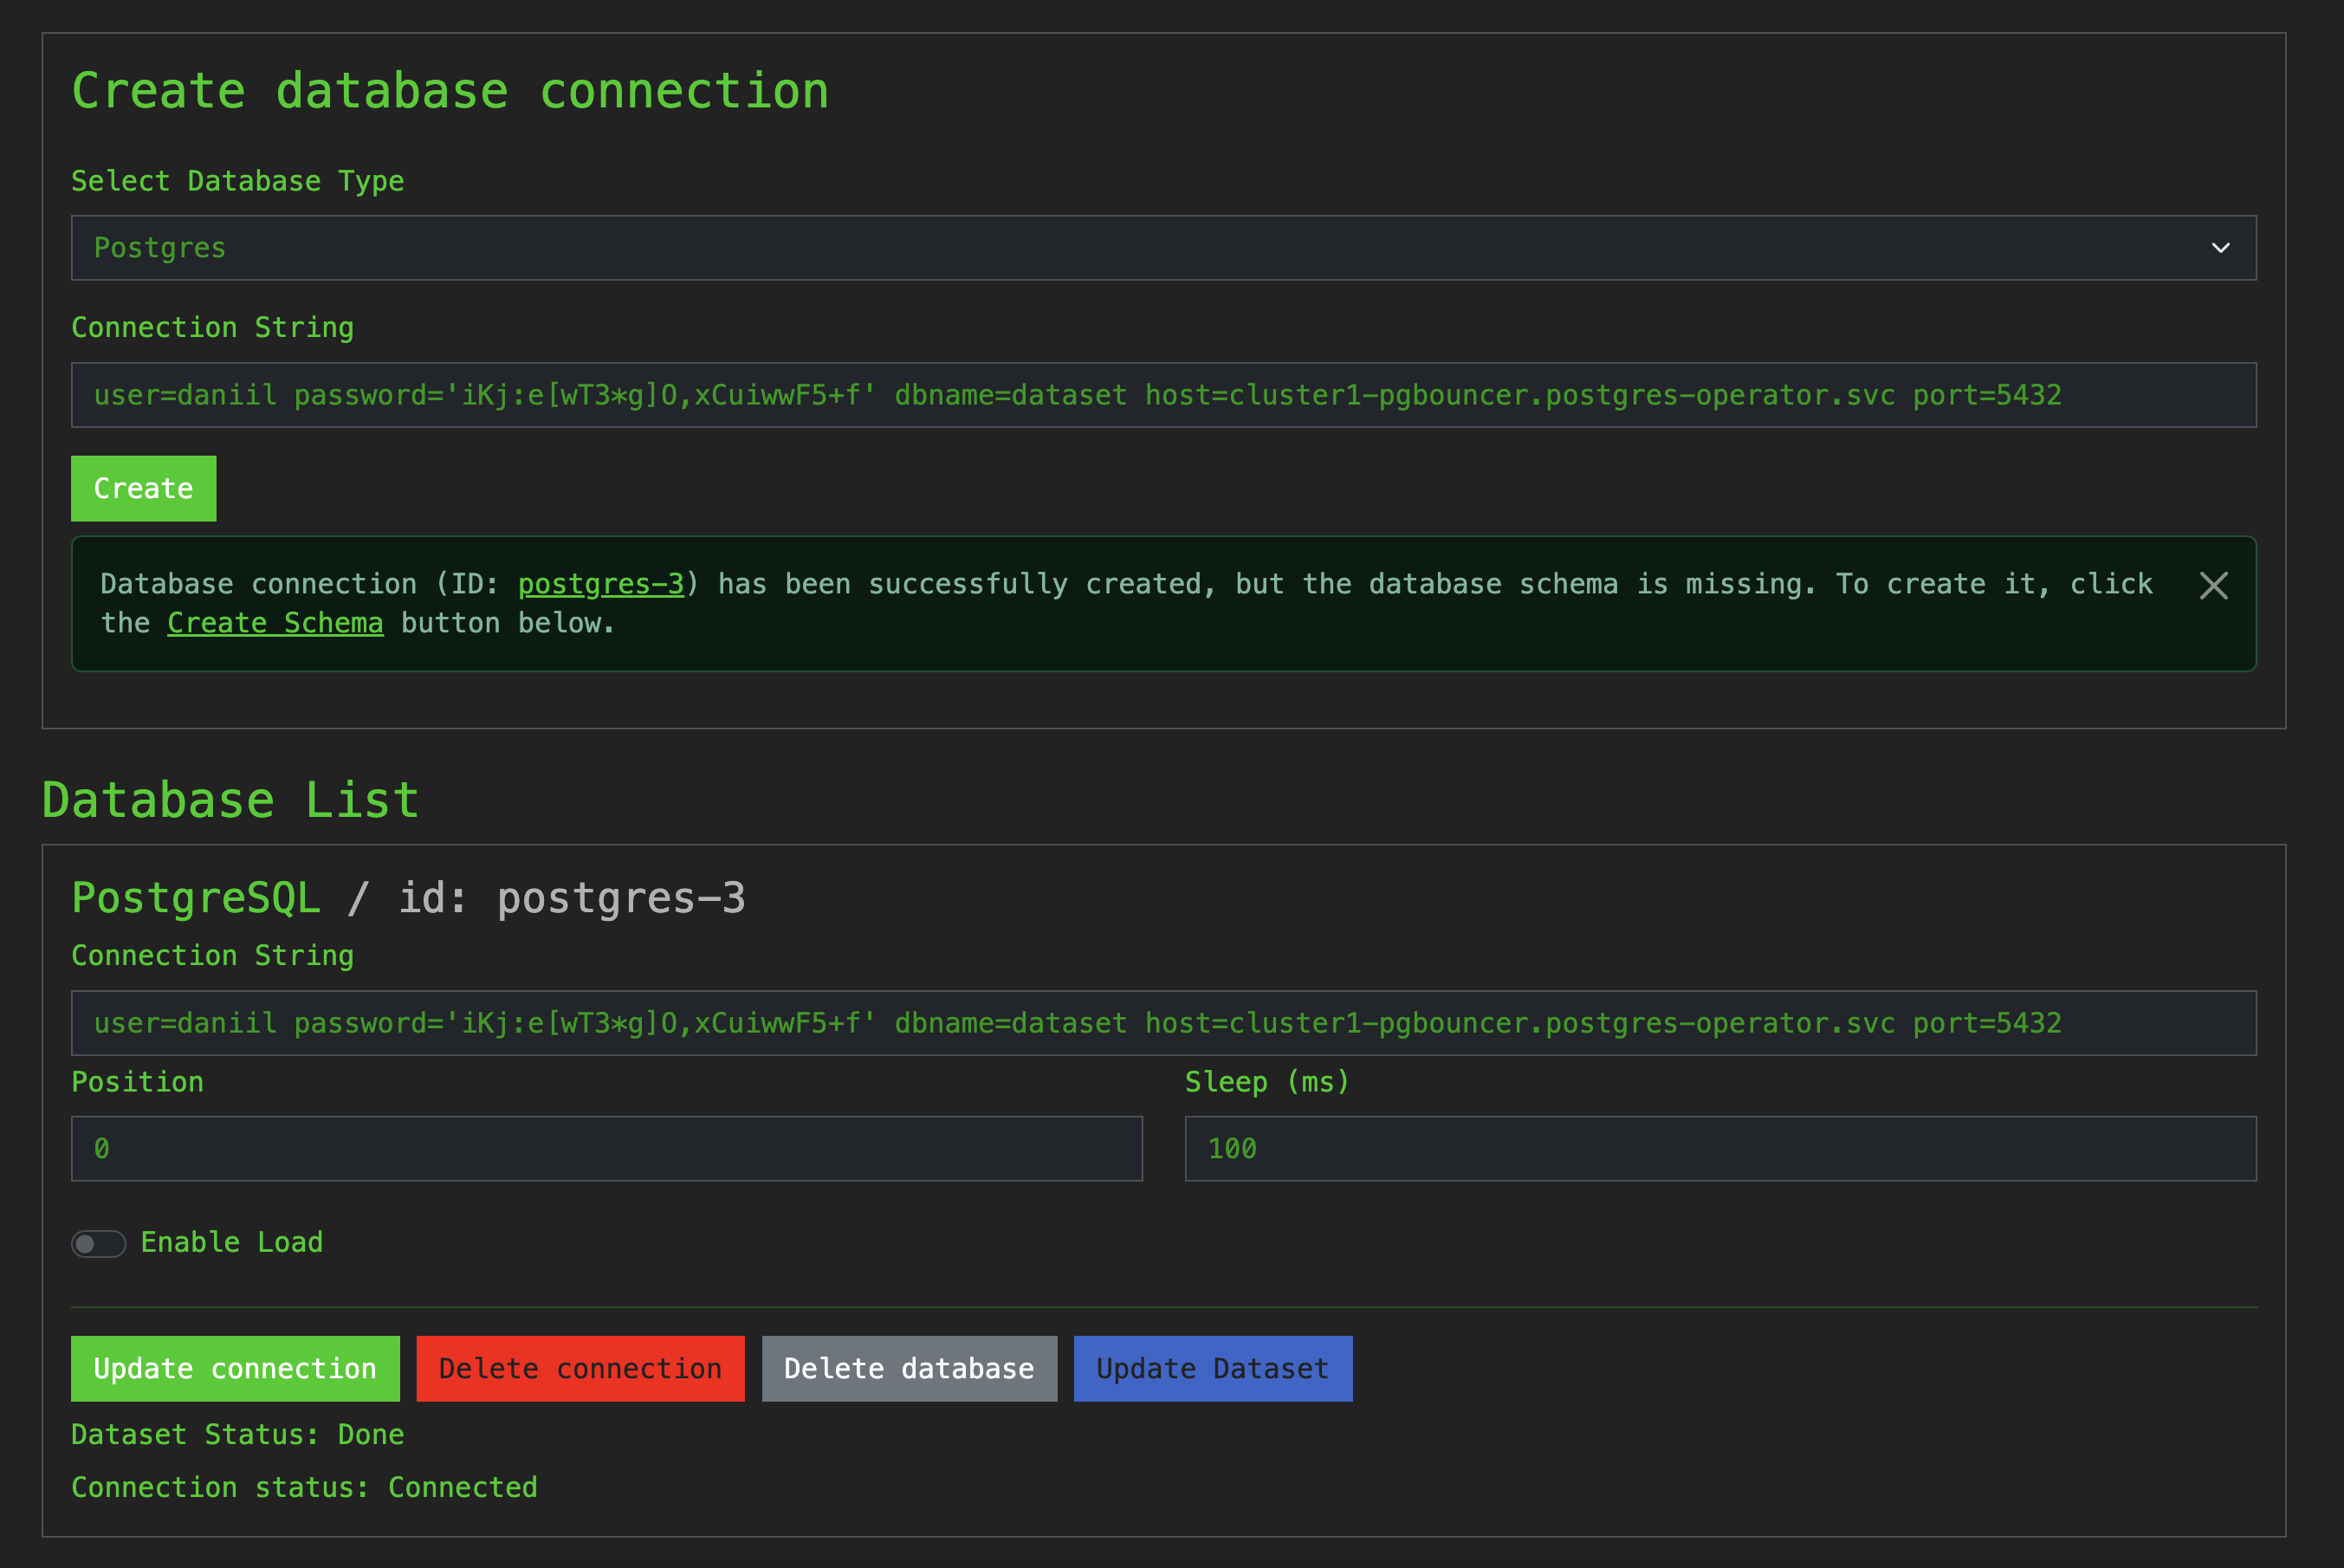
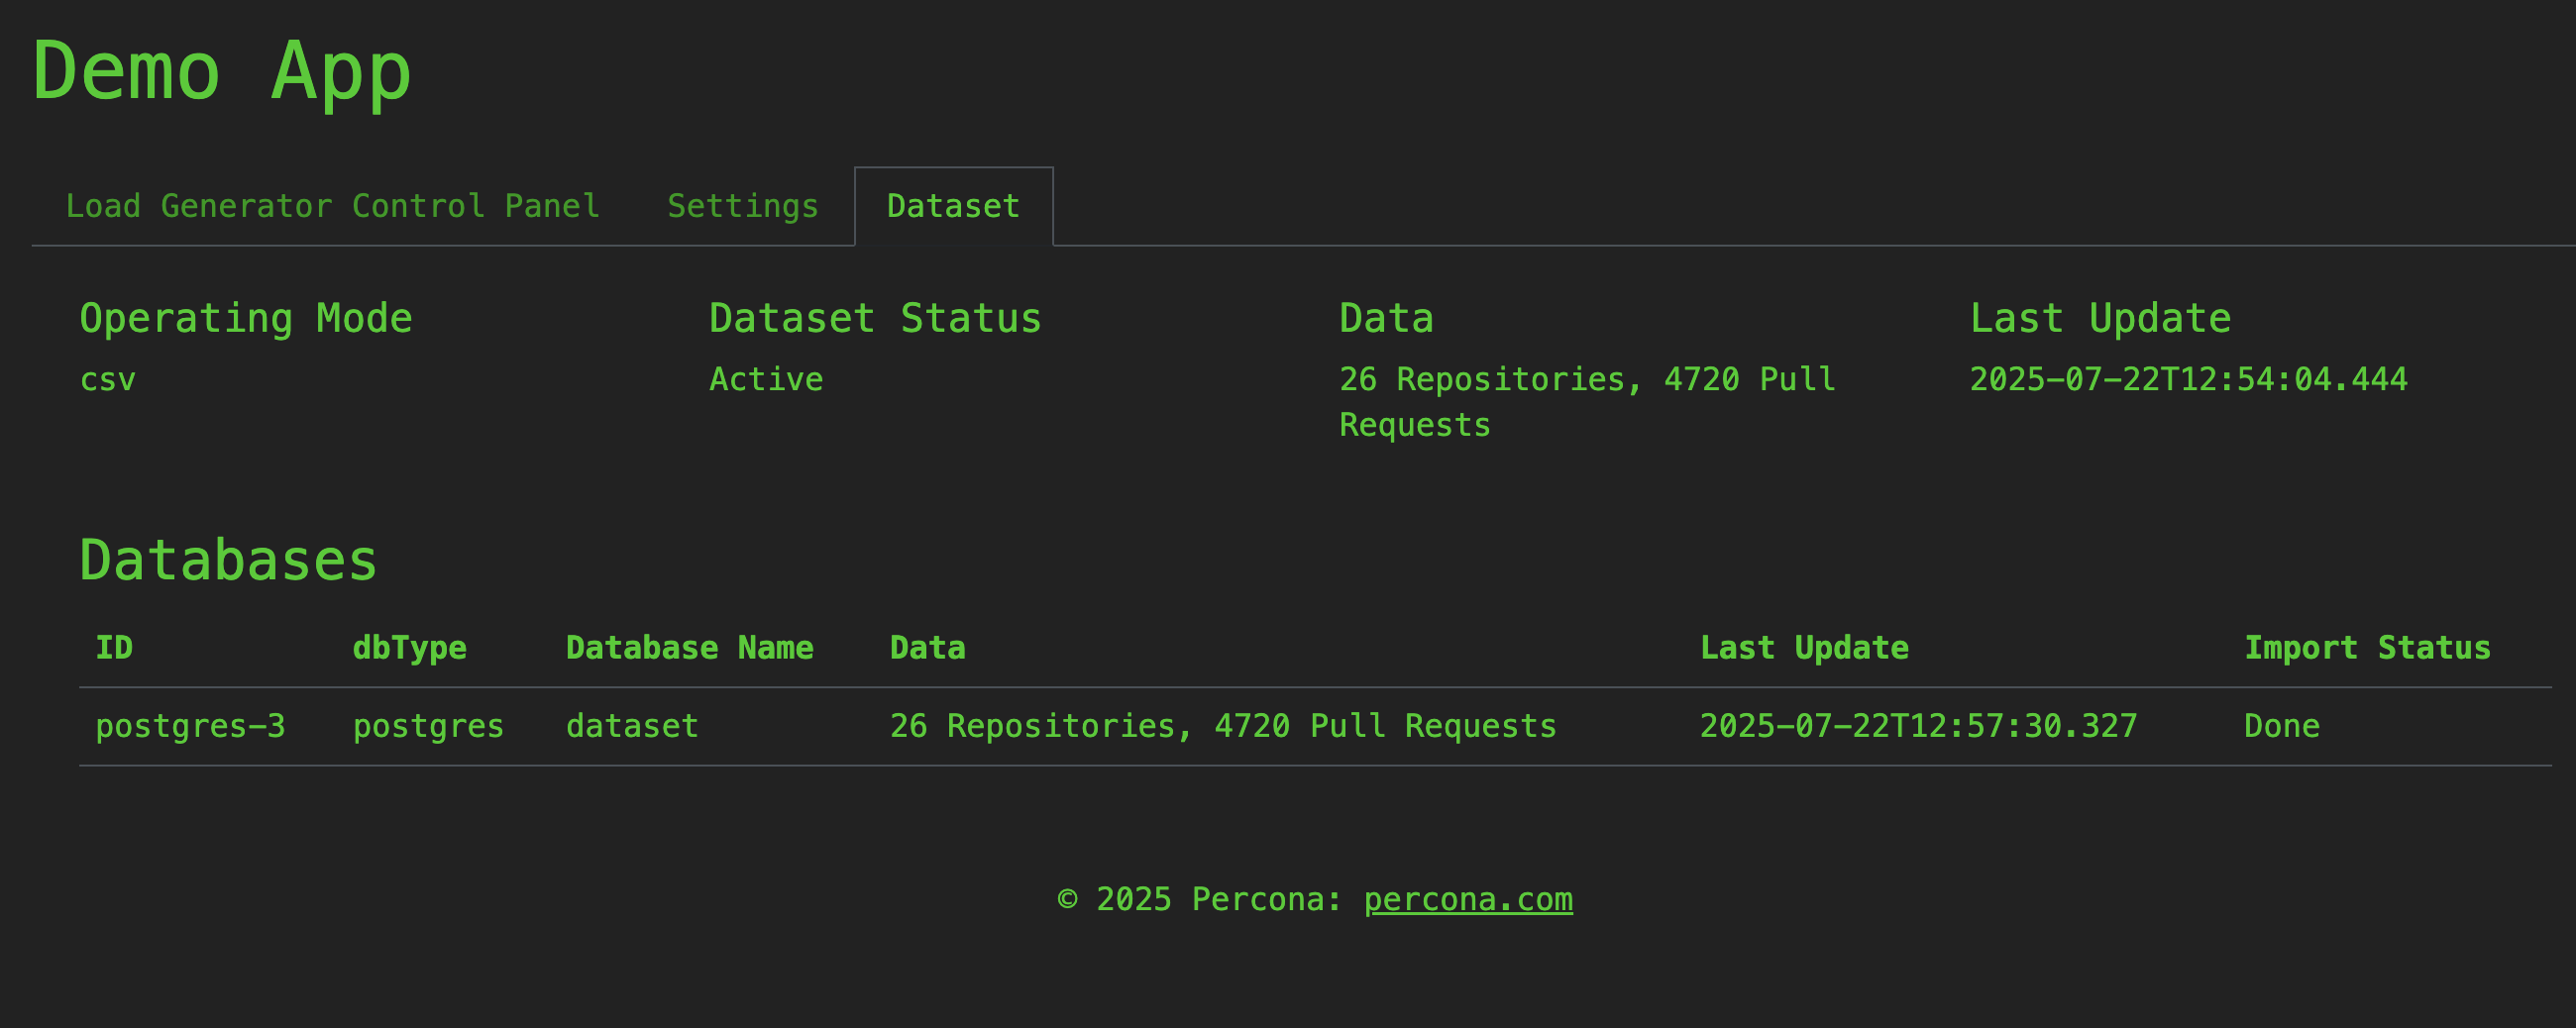
Click the “Import Dataset” button and wait a few minutes until the import is in Done status in the Dataset tab.
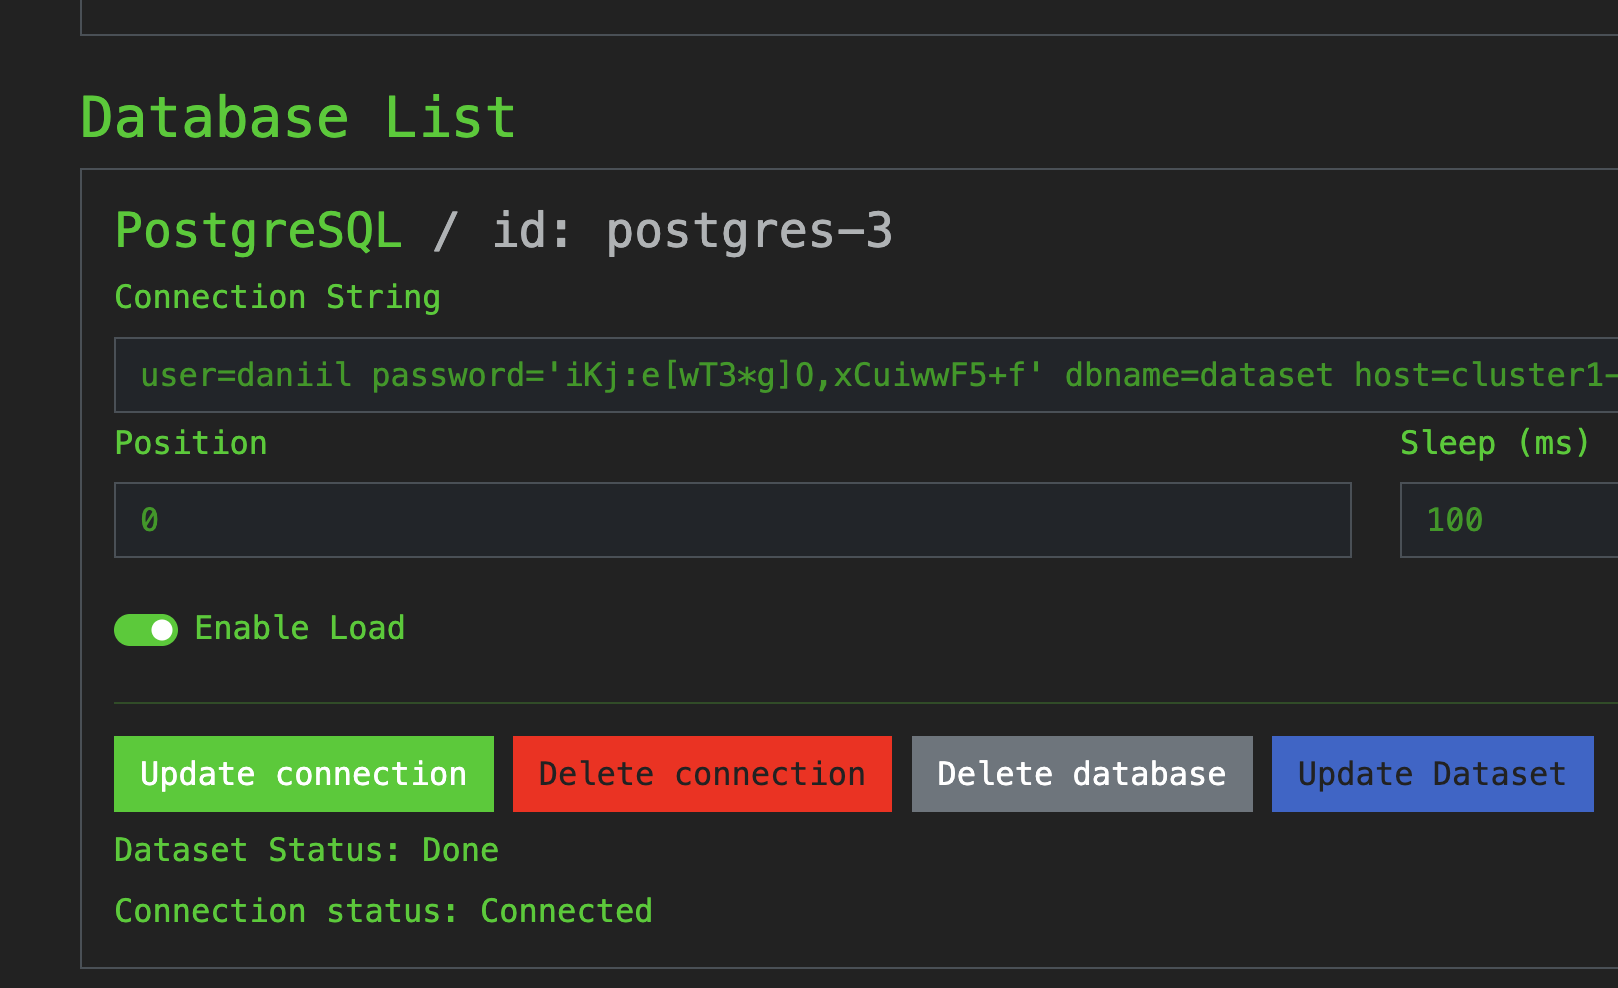
Enable Load Generation
Activate the load generator:
- Toggle Enable Load in the connection settings
- Click Update Connection
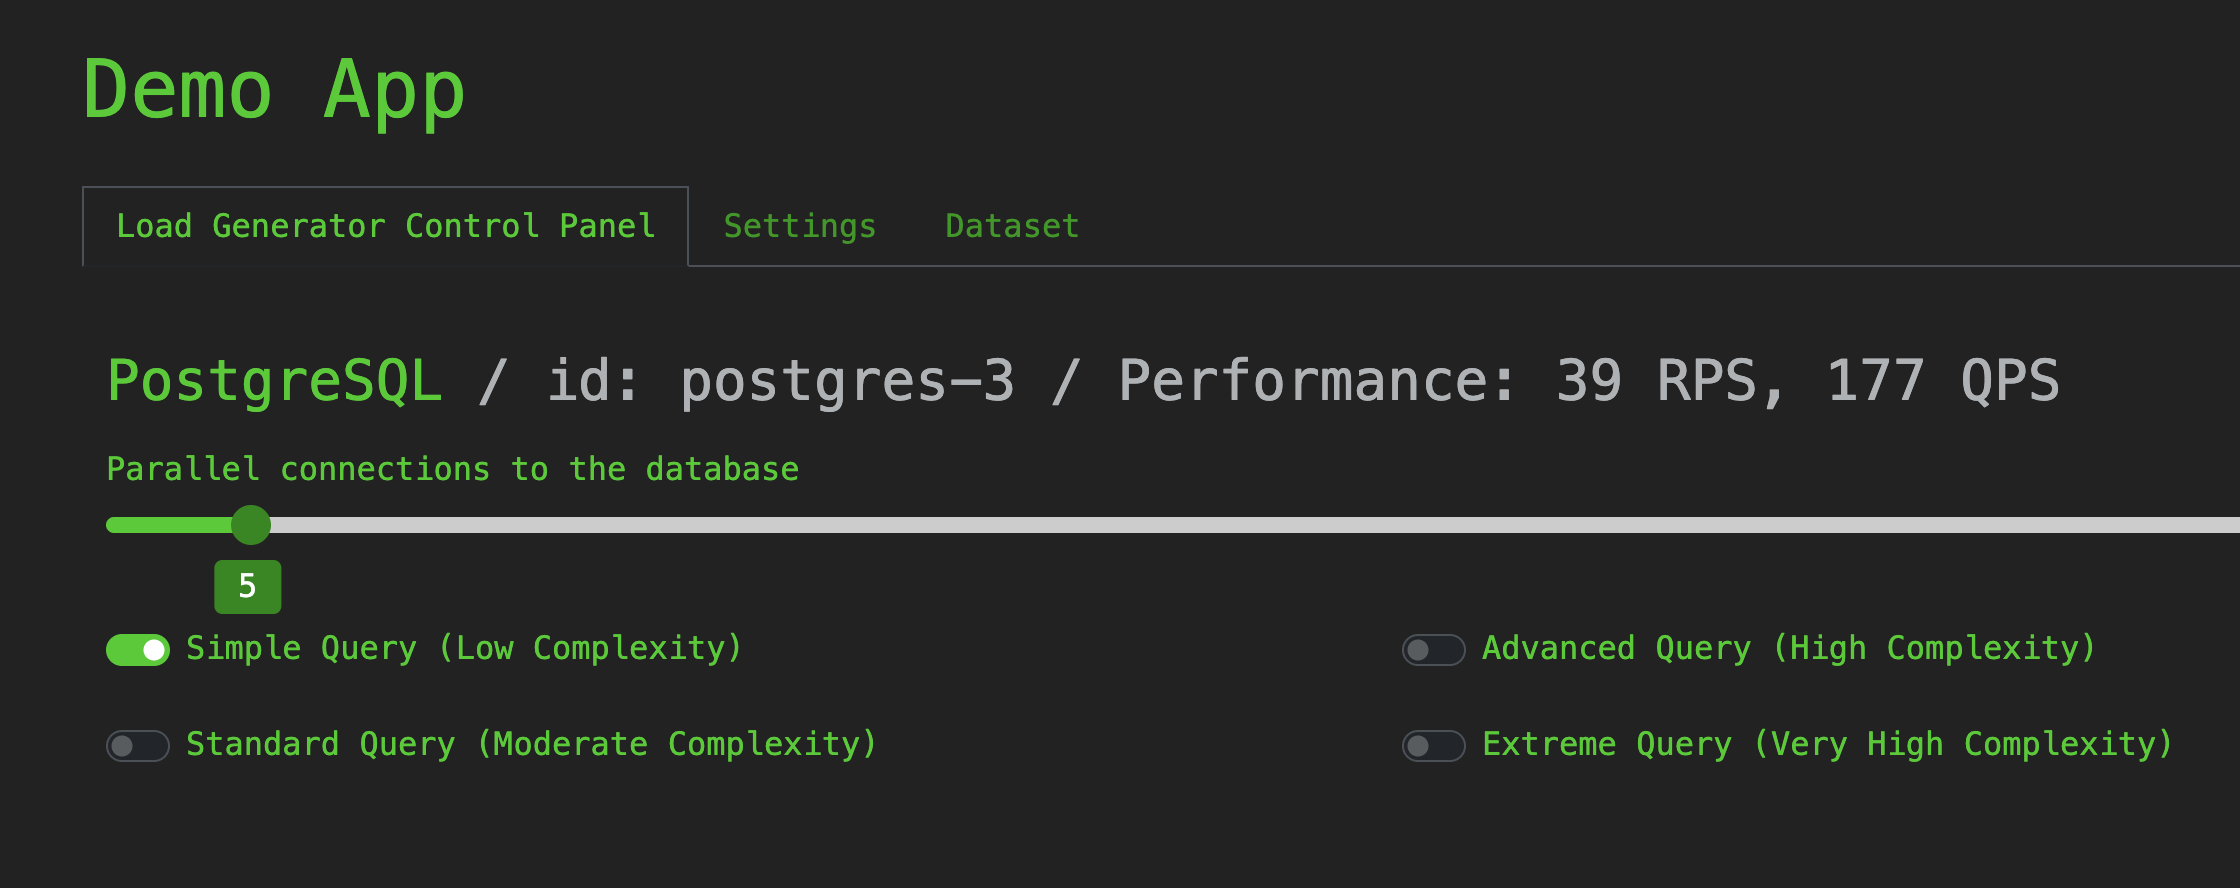
Open the Load Generator Control Panel and adjust sliders and toggles as needed:
Conclusion
In this part, we:
- Deployed a demo application via Helm in ArgoCD
- Connected it to our PostgreSQL cluster
- Managed PostgreSQL users and access via GitHub and GitOps
- Imported a dataset and activated the traffic generator through the web UI
In Part 4, we’ll deploy Coroot for observability and profiling.
It’s an impressive tool for diagnosing behavior across services in the Kubernetes cluster. ∎


Discussion
We invite you to our forum for discussion. You are welcome to use the widget below.