
PMM Client on Raspberry Pi 4
This will be the third in my series of Percona Products on a Raspberry Pi. My previous posts:
- How to Build a Percona Server “Stack” on a Raspberry Pi 3+
- Raspberry Pi Bullseye Percona Server 64bit
Before I get started I would like to thank guriandoro, for the work he did in compiling the PMM Client tools in his 2021 blog.
My regular readers know how much I love the Raspberry Pi and MySQL. I have several hobby projects that collect data, and MySQL on Pi is great
solution!
I recently decided that I needed to be able to monitor my two MySQL Server.
The steps below should work on the Raspberry Pi 3+ and 4.
What better tool to use than PMM
In this blog we will be using PMM Client 2.27 and PMM Server version 2.39.
Prerequisites
Important Note: Your Raspberry Pi must be on Raspbian Bullseye.
I will assume if you have made it this far into the BLOG post, then you already have a running PMM Server. If not, you can read about installing a PMM Server here.
Add the pmm user to your MySQL Server
CREATE USER 'pmm'@'127.0.0.1' IDENTIFIED BY 'pass' WITH MAX_USER_CONNECTIONS 10;
GRANT SELECT, PROCESS, REPLICATION CLIENT, RELOAD, BACKUP_ADMIN ON *.* TO 'pmm'@'localhost';
The following steps should be run on your Raspberry Pi
Download the pre-complied pmm-client tools
These were complied based on 2.27 source code. You can see the steps I followed to compile the tools here.
cd
wget  https://github.com/cetanhota/pi4-arm-pmm-client/archive/refs/heads/main.zip
unzip main.zip
Once we have the client unzipped its a good idea to verify that the tools will work on your Raspberry Pi.
cd ~/pi4-arm-pmm-client-main/raspbian-bullseye
./pmm-agent --version
You should get output like below.
ProjectName: pmm-agent
ProjectName: pmm-agent
Version: 2.27.0-84-g78b8519-dirty
PMMVersion: 2.27.0-84-g78b8519-dirty
Timestamp: 2023-08-16 00:57:34 (UTC)
FullCommit: 78b85198ad1e2c319d4012ef5ae338f389e2000a
Branch: main
If the pmm-agent displayed info like above, then you good to keep moving down the document. If you ran into issues please post in the comments and we can see what can be done to get you working. The only problem I ran in to was that the root user could not execute the client tools.
Setup install directories
We need to create the install directory and move files to the correct locations.
sudo mkdir -p /usr/local/percona
sudo mkdir -p /usr/local/percona/pmm2
sudo mkdir -p /usr/local/percona/pmm2/tools
sudo mkdir -p /usr/local/percona/pmm2/config
sudo mkdir -p /usr/local/percona/pmm2/exporters
sudo mkdir -p /usr/local/percona/exporters
sudo mkdir -p /usr/local/percona/exporters/collectors/textfile-collector/high-resolution
sudo mkdir -p /usr/local/percona/exporters/collectors/textfile-collector/medium-resolution
sudo mkdir -p /usr/local/percona/exporters/collectors/textfile-collector/low-resolution
Copy files into directories
cd ~/pi4-arm-pmm-client-main/raspbian-bullseye
sudo cp pmm-admin pmm-agent /usr/local/bin
sudo cp node_exporter vmagent /usr/local/percona/pmm2/exporters
Configure the PMM Client
Its time to configure and test the PMM Client for the MySQL server where we are install PMM Client.
Please make sure you have the following three items:
- PMM Server Hostname or IP Address
- PMM Server admin ID
- PMM Server admin Password
sudo pmm-agent setup --config-file=/usr/local/percona/pmm2/config/pmm-agent.yaml\
 --server-address=<YOUR-PMM-Server> --server-insecure-tls\
 --server-username=<YOURADMIN> --server-password=<YOURPASSWORD>
Now that the PMM Client has been configured, lets move on to starting the PMM Client.
Start the PMM Client
sudo pmm-agent --config-file=/usr/local/percona/pmm2/config/pmm-agent.yamlVerify by reviewing the client is running correctly. If all is well you should see output like:
INFO[2023-08-15T17:00:34.294-04:00] Loading configuration file /usr/local/percona/pmm2/config/pmm-agent.yaml.  component=main
INFO[2023-08-15T17:00:34.295-04:00] Using /usr/local/percona/pmm2/exporters/node_exporter  component=main
INFO[2023-08-15T17:00:34.295-04:00] Using /usr/local/percona/pmm2/exporters/mysqld_exporter  component=main
INFO[2023-08-15T17:00:34.295-04:00] Using /usr/local/percona/pmm2/exporters/mongodb_exporter  component=main
INFO[2023-08-15T17:00:34.295-04:00] Using /usr/local/percona/pmm2/exporters/postgres_exporter  component=main
INFO[2023-08-15T17:00:34.295-04:00] Using /usr/local/percona/pmm2/exporters/proxysql_exporter  component=main
INFO[2023-08-15T17:00:34.295-04:00] Using /usr/local/percona/pmm2/exporters/rds_exporter  component=main
INFO[2023-08-15T17:00:34.295-04:00] Using /usr/local/percona/pmm2/exporters/azure_exporter  component=main
INFO[2023-08-15T17:00:34.296-04:00] Using /usr/local/percona/pmm2/exporters/vmagent  component=main
INFO[2023-08-15T17:00:34.296-04:00] Starting...                                   component=client
INFO[2023-08-15T17:00:34.296-04:00] Starting local API server on http://127.0.0.1:7777/ ...  component=local-server/JSON
INFO[2023-08-15T17:00:34.296-04:00] Connecting to https://admin:***@192.168.1.127:443/ ...  component=client
INFO[2023-08-15T17:00:34.298-04:00] Started.                                      component=local-server/JSON
INFO[2023-08-15T17:00:34.320-04:00] Connected to 192.168.1.127:443.               component=client
INFO[2023-08-15T17:00:34.320-04:00] Establishing two-way communication channel ...  component=client
INFO[2023-08-15T17:00:34.341-04:00] Two-way communication channel established in 21.349589ms. Estimated clock drift: -84.399159ms.  component=client
At this point press ctl+c to stop the pmm-agent.
If you want to start the pmm-agent again and running the background use this command:
sudo nohup pmm-agent --config-file=/usr/local/percona/pmm2/config/pmm-agent.yaml &You may choose a different startup process for the PMM Client based on personal preference.
Add pt-summary to the PMM Client
cd /usr/local/percona/pmm2/tools
sudo wget percona.com/get/pt-summary
sudo chmod ugo+x pt-summary
Let’s see summary in action:
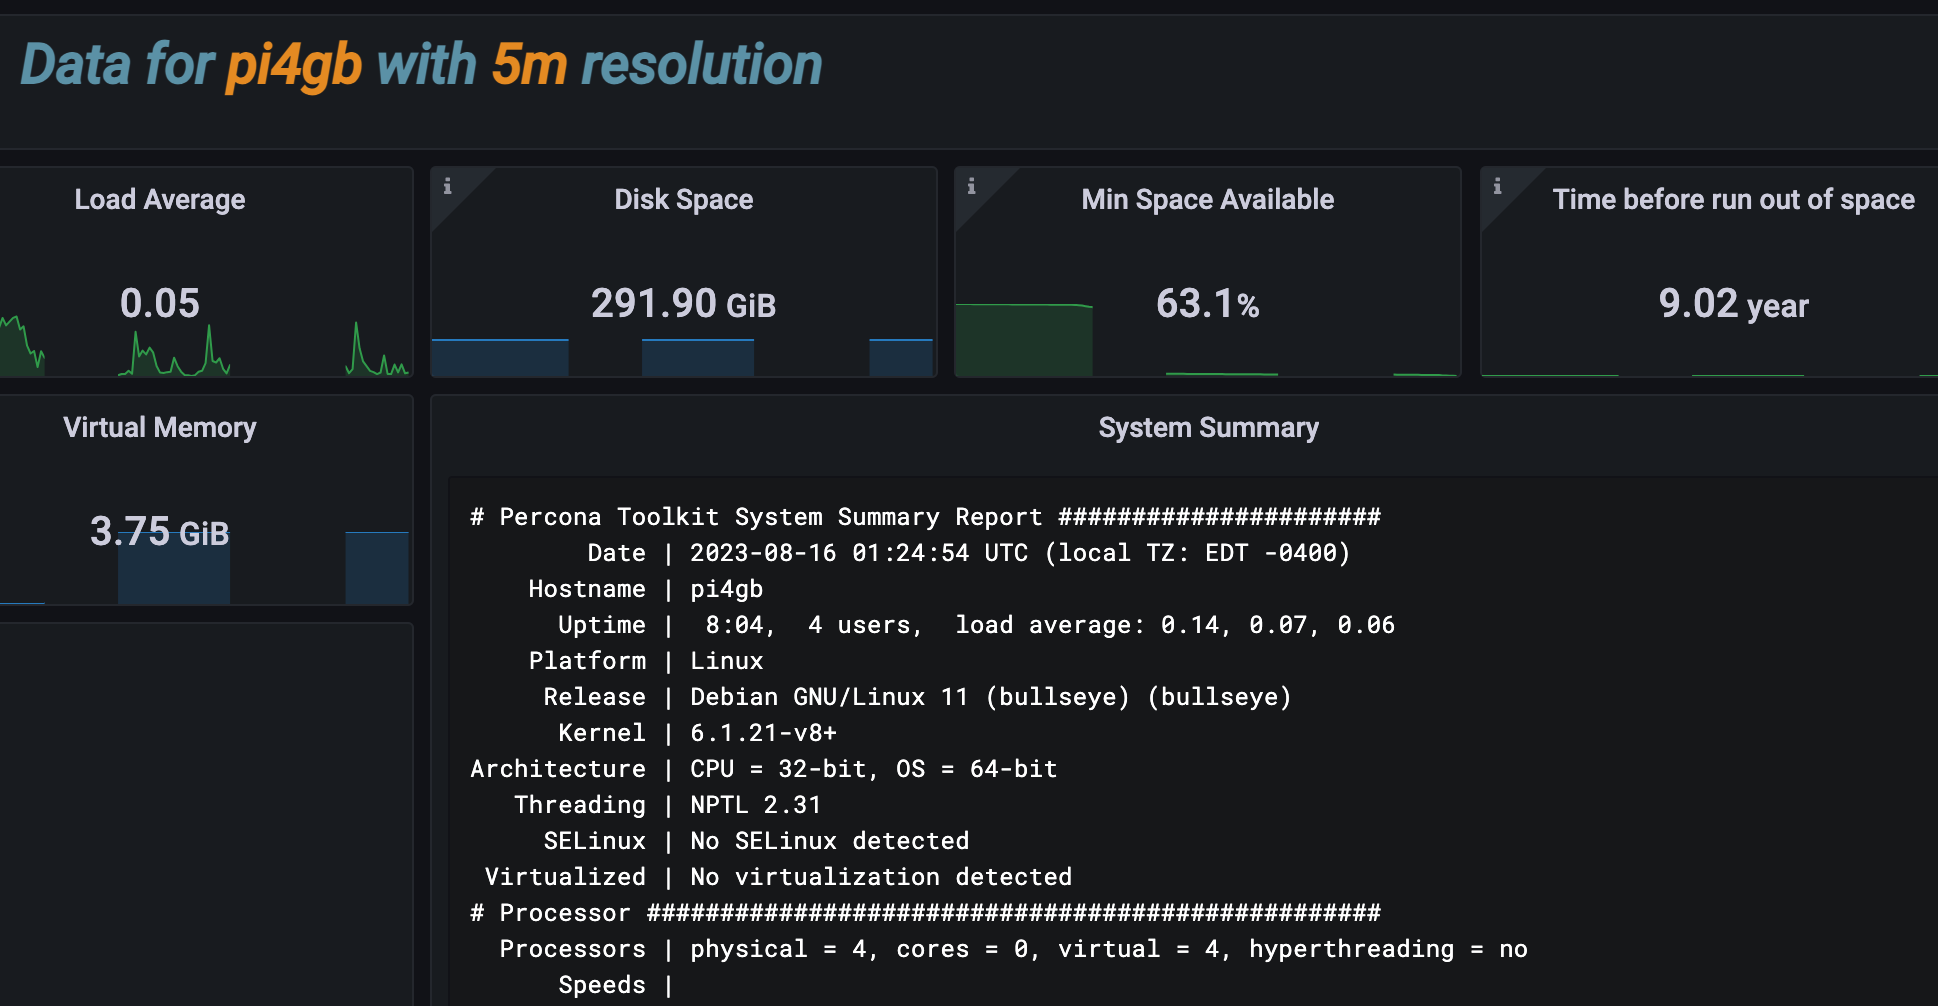
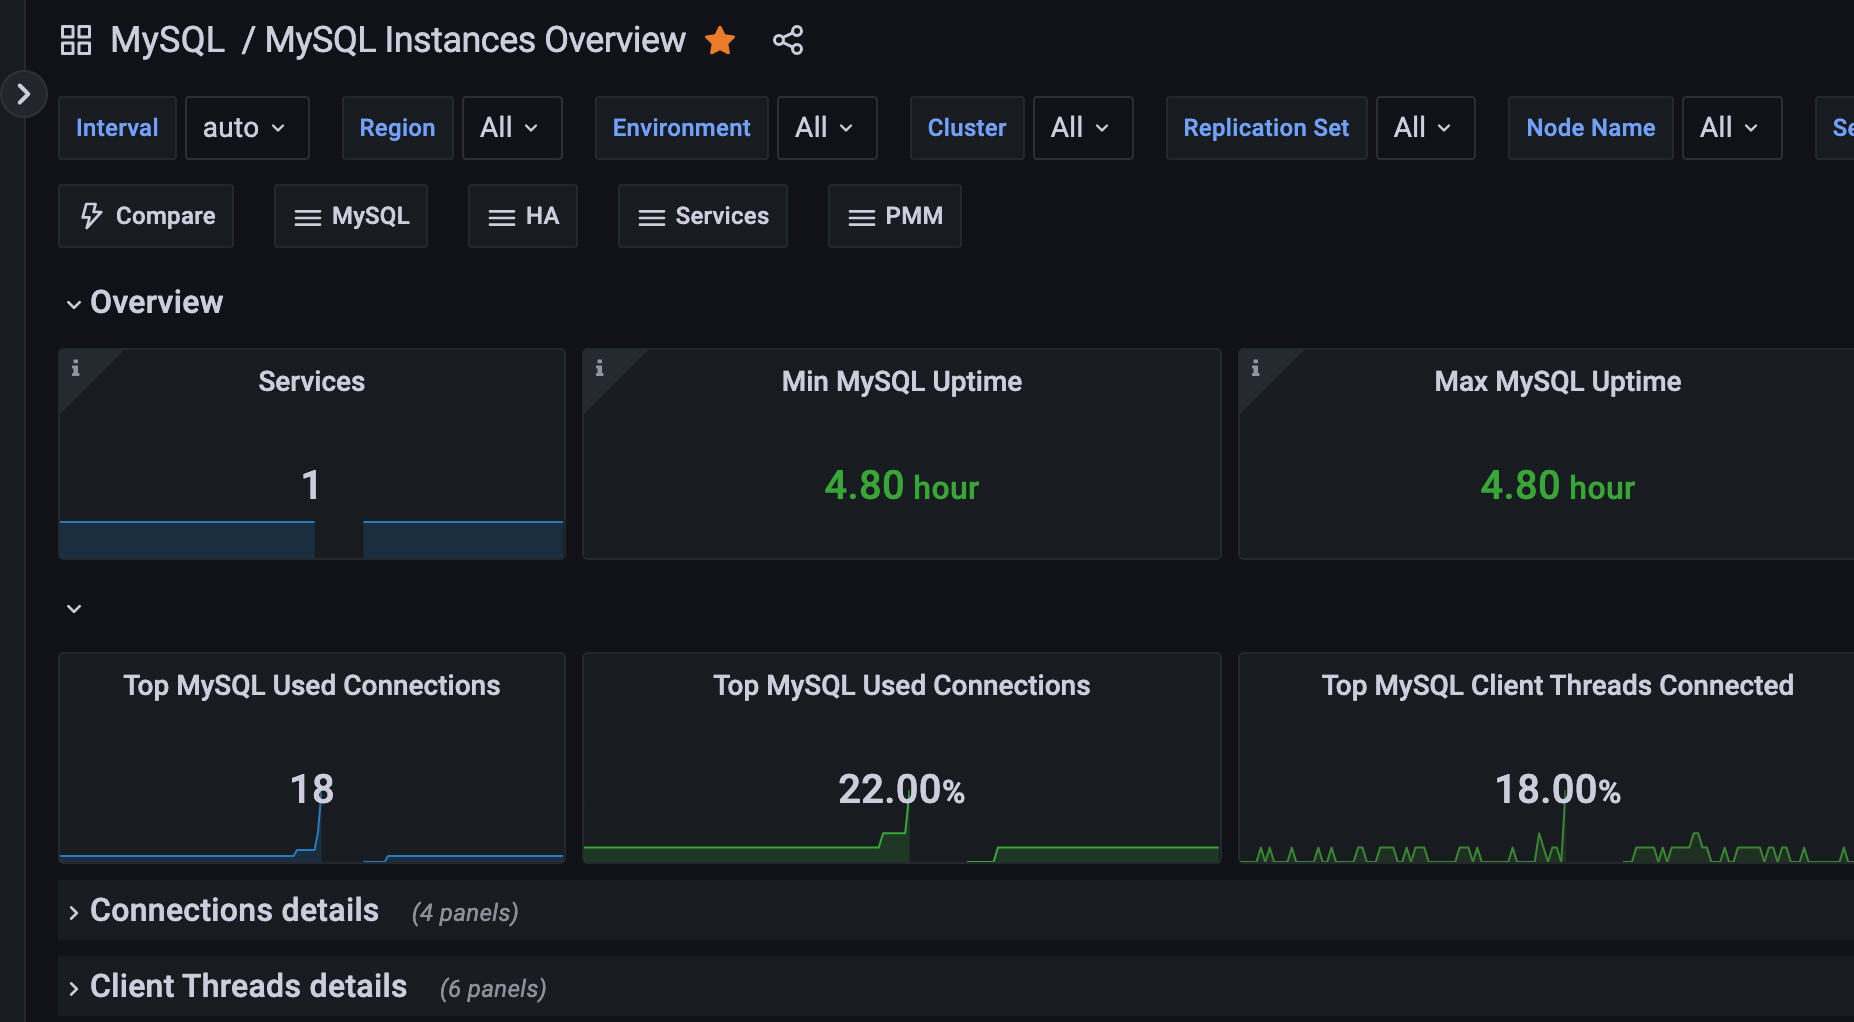
Add your Raspberry Pi MySQL Server to PMM Server
I am sure most of you know how to add a server to your existing PMM Server but if you have not done this before here is what you need to do.
- Connect to your PMM Server.
- Use pmm-admin command to add server for monitoring.
/usr/local/percona/pmm2/bin/pmm-admin add mysql --service-name=<MYSQL SERVER NAME> --server-insecure-tls --server-url=https://<YOUR ADMIN>:<YOUR PASSWORD>@localhost --username=<DB USER> --password=<DB PASSWORD> --host=<MYSQL SERVER NAME>PMM Server Screen Shoot
In Closing
I really loved working on this little project. I hope you find some use for the information. ∎

Discussion
We invite you to our forum for discussion. You are welcome to use the widget below.