
How to Develop a Simple Web Application Using Docker, Nginx, PHP, and Percona Server for MongoDB
I’m developing an application that takes data from different sources, processes it, and prepares reports. In this series of articles, I will explain how to install and configure the tools, application, and database to develop and run the application.
About the application and choice of tools
The application I develop gets data from GitHub, Jira, and websites via API, processes it and creates reports according to the desired requirements.
The application is developed with PHP version 8+ and Nginx as a web server, and Percona Server for MongoDB as a database. For local development, I use Docker and Docker-compose.
I use PHP and Nginx because I’m familiar with them, and it’s a popular stack with lots of documentation and examples. Docker was chosen for the same reason. I used to install Nginx/Apache + PHP + Database in the same container, but over time I found Docker-compose and separate containers more convenient, so now I use docker-compose.
My application includes the following:
- Web application to run in a browser and display reports.
- Сonsole scripts in PHP for bulk data updates in the background on the server.
As a database for this application, I use MongoDB. There are objective reasons for that:
- The API I’m querying for data from gives it back to me page by page in JSON format. I need to do a lot of queries, so my script gets all data and stores it in MongoDB beforehand to create reports without needing to go to API.
- MongoDB is suitable for storing data in JSON and queries with different conditions.
- The data schema from the API can be very different and flexible depending on the service and query. MongoDB allows me to save responses from the API to the database as it is, without complicated processing or preconfiguring the database schema. I didn’t want to spend much time setting up the database table schema.
- Installing and configuring MongoDB for development is easy and does not require great skills to work with it.
I use Percona Server for MongoDB because it’s free and open source. I once thought about backups and monitoring, and Percona has ready-made solutions for that.
First, I will talk about my development configuration. I am starting from scratch using a minimal PHP application as an example.
Preparing Docker and Docker-compose
Dockerfile for PHM + MongoDB
For PHP to work with MongoDB, we need to install PHP with the required extensions. I prepared a Dockerfile for PHP 8.2 and used php-fpm because I use Nginx as a web server.
Dockerfile
FROM php:8.2-fpm

RUN apt-get -y update \
    && apt-get install -y libssl-dev pkg-config libzip-dev unzip git

RUN pecl install zlib zip mongodb \
    && docker-php-ext-enable zip \
    && docker-php-ext-enable mongodb

# Install composer (updated via entry point)
RUN curl -sS https://getcomposer.org/installer | php -- --install-dir=/usr/local/bin --filename=composer
I also used Composer and installed it immediately in the container with Dockerfile.
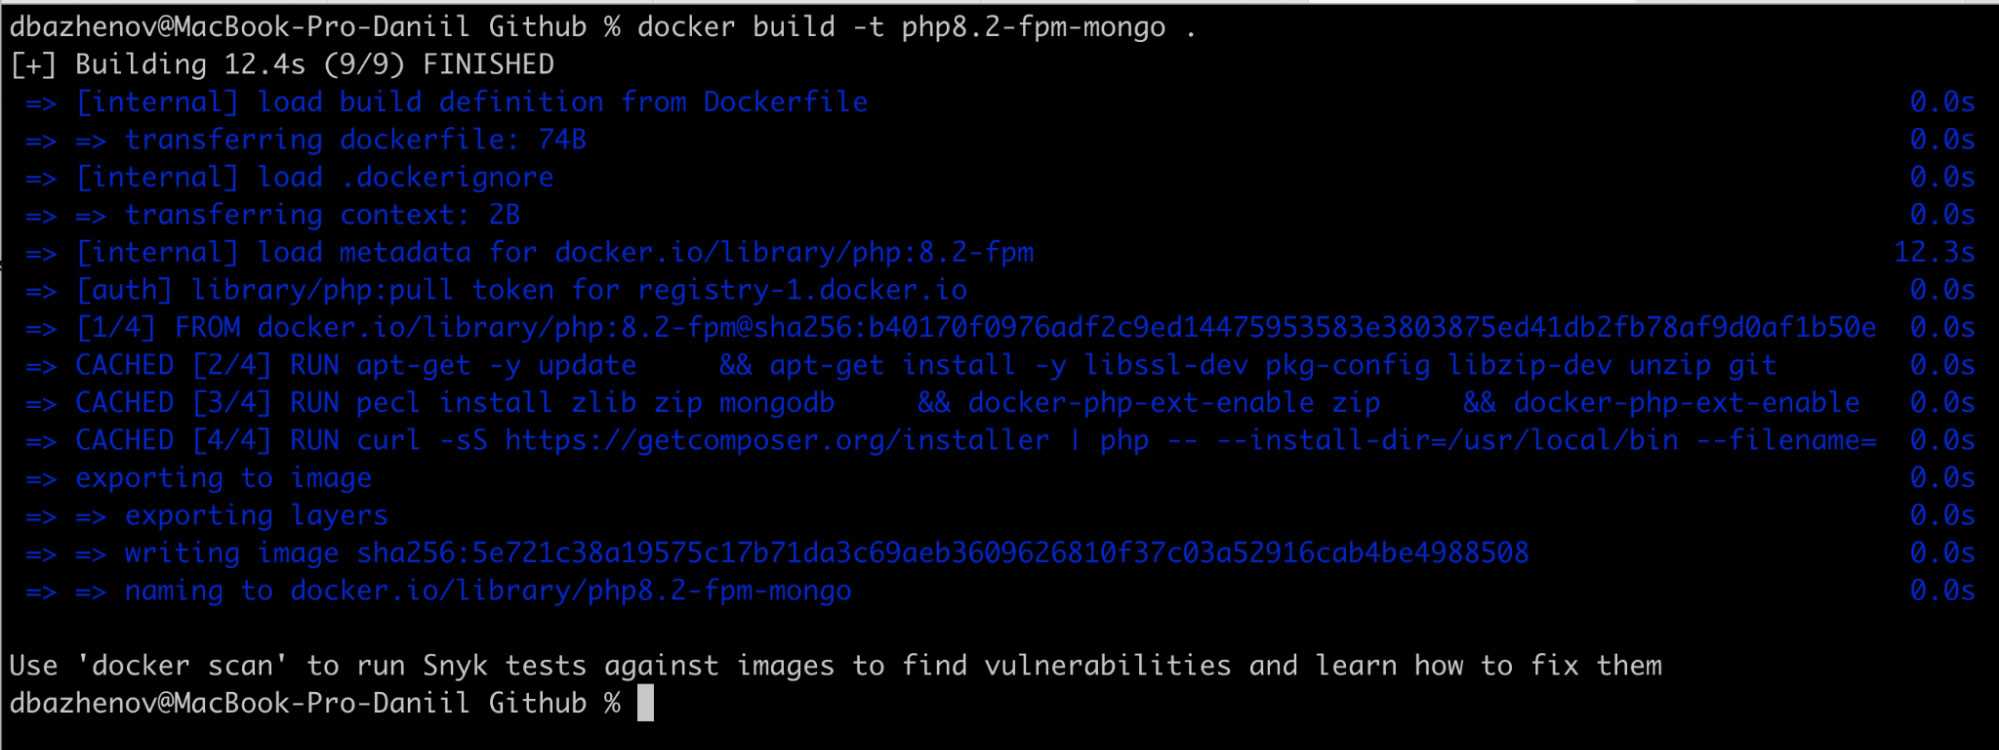
Now I run the Image build command from the Dockerfile to use it in Docker Compose
docker build -t php8.2-fpm-mongo .Where php8.2-fpm-mongo - is the name of the image to be used in docker-compose
Docker-compose.yml to test the web app
The next step is to create the docker-compose.yml file. I will add the Nginx web server and my Image with PHP and MongoDB to the Docker-compose file.
docker-compose.yml
version: '3.9'

services:
  web:
    image: nginx:latest
    ports:
      - '80:80'
    volumes:
      - ./app:/var/www/html
      - ./config/default.conf:/etc/nginx/conf.d/default.conf

  php-fpm:
    image: php8.2-fpm-mongo
    volumes:
      - ./app:/var/www/html
The application is located in the app/ folder in the same directory as docker-compose.yml.
Now it will be a very simple index.php script that prints out information about itself.
Create an app directory and an index.php file.
app/index.php
<?php

phpinfo();
Structure of files and folders
.
├── app
│       └── index.php
├── config
│       └── default.conf
├── Dockerfile
└── docker-compose.yml
You will also notice /config/default.conf. This is the configuration of Nginx for handling requests and running PHP. Here is my example of a default.conf file. Let’s create it too.
/config/default.conf
server {
listen 80;
server_name localhost;
index index.php index.html;
error_log /var/log/nginx/error.log;
access_log /var/log/nginx/access.log;
root /var/www/html;
rewrite ^/(.*)/$ /$1 permanent;
location / {
try_files $uri $uri/ /index.php?$query_string;
}
location ~ \.php$ {
try_files $uri =404;
fastcgi_split_path_info ^(.+\.php)(/.+)$;
fastcgi_pass php-fpm:9000;
fastcgi_index index.php;
include fastcgi_params;
fastcgi_param SCRIPT_FILENAME $document_root$fastcgi_script_name;
fastcgi_param PATH_INFO $fastcgi_path_info;
fastcgi_buffering off;
}
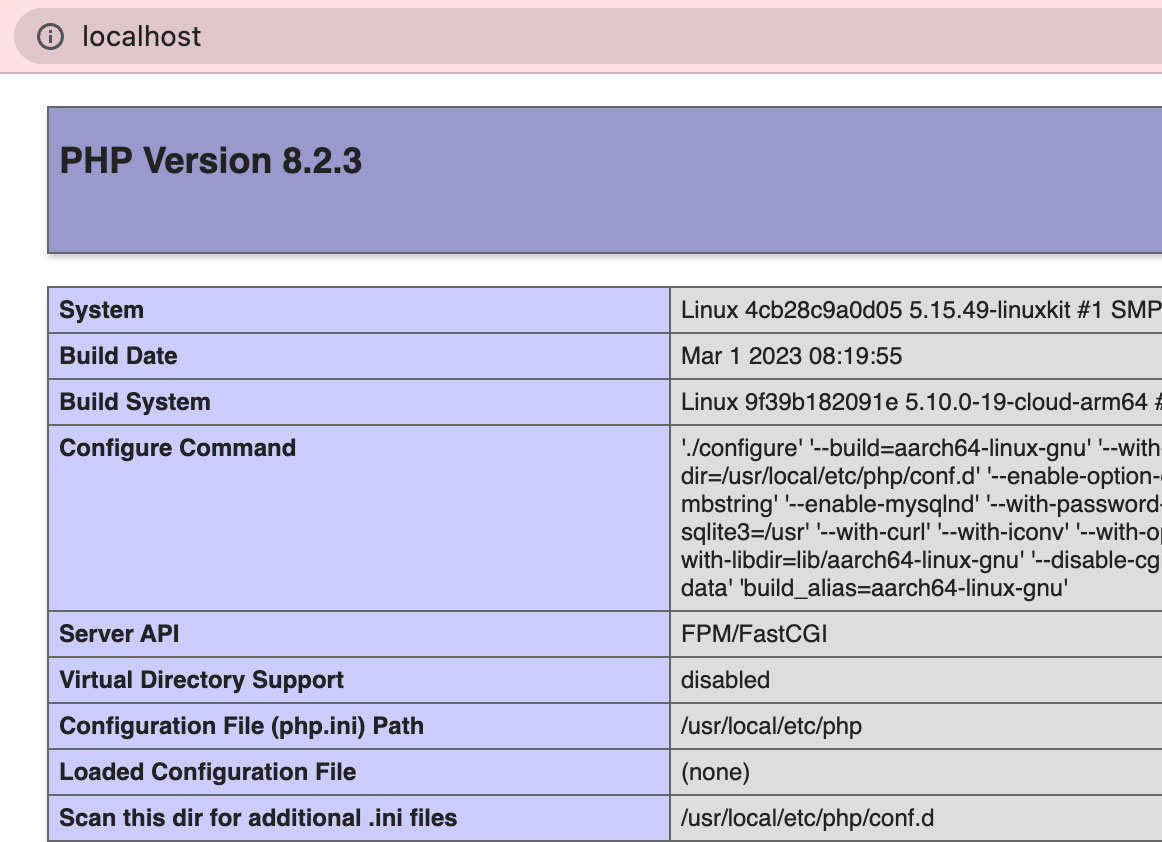
}If we run docker-compose now, we can open localhost in the browser and see the running php from the app/index.php file.
Run docker-compose
docker-compose up -d
Open localhost in the browser.
Stop docker-compose to continue setting up. We haven’t connected MongoDB yet.
docker-compose down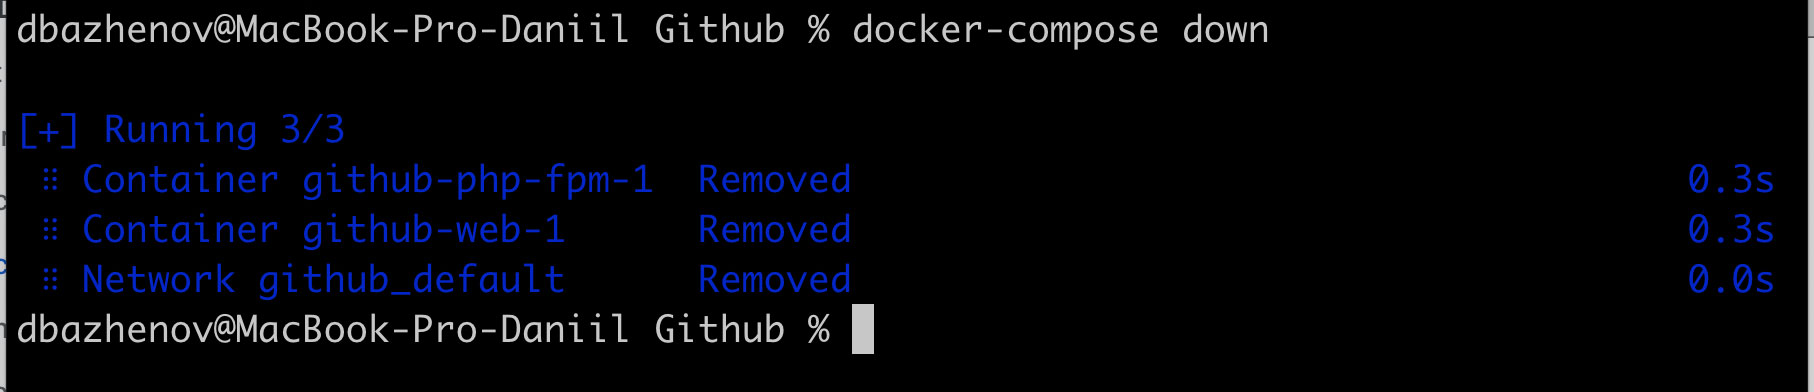
Connect MongoDB to our docker-compose
Add the new db service to our docker-compose.yml.
version: '3.9'

services:
  web:
    image: nginx:latest
    ports:
      - '80:80'
    volumes:
      - ./app:/var/www/html
      - ./config/default.conf:/etc/nginx/conf.d/default.conf

  php-fpm:
    image: php8.2-fpm-mongo
    volumes:
      - ./app:/var/www/html
    environment:
      DB_USERNAME: root
      DB_PASSWORD: secret
      DB_HOST: mongodb # matches the service with mongodb

  mongodb:
    image: "percona/percona-server-mongodb:6.0.4"
    # image: "percona/percona-server-mongodb:6.0.4-3-arm64" # For Apple M1/M2
    volumes:
      - ./data:/data/db
    restart: always
    environment:
      MONGO_INITDB_ROOT_USERNAME: root
      MONGO_INITDB_ROOT_PASSWORD: secret
      MONGO_INITDB_DATABASE: tutorial
    ports:
      - "27017:27017"
If you examine the changes in the docker-compose.yml file carefully, you will notice:
- I add image (db) with Percona Server MongoDB 6.0.4
- I use data/ folder in the same directory as volumes. It’s convenient for me to easily access DB files, transfer them, and examine them locally.
- I pass environment variables to create a MongoDB root user.
- I also added environment variables in php-fpm to use them to connect to the database in the application.
- And the volumes parameter will link our local app directory directly to the container, this will allow us to modify the code and immediately check the result in the browser without restarting the container.
    volumes:
      - ./app:/var/www/html
Let’s modify our PHP script to check the operation of the database.
Connecting to MongoDB in the application
Install required PHP packages to work with MongoDB
Create an app/composer.json file to install and use the required MongoDB libraries and extensions for PHP.
app/composer.json
{
    "require": {
        "mongodb/mongodb": "^1.6",
        "ext-mongodb": "^1.6"
    }
}
Connect to the php-fpm container and install the Composer packages
Run docker-compose
docker-compose up -dLook up the name of the container with php-fpm, in my case it is github-php-fpm-1.
Run the command to connect to the container:
docker exec -it [php-fpm-container] bashRun the installation of the Composer packages described in our composer.json file with
composer install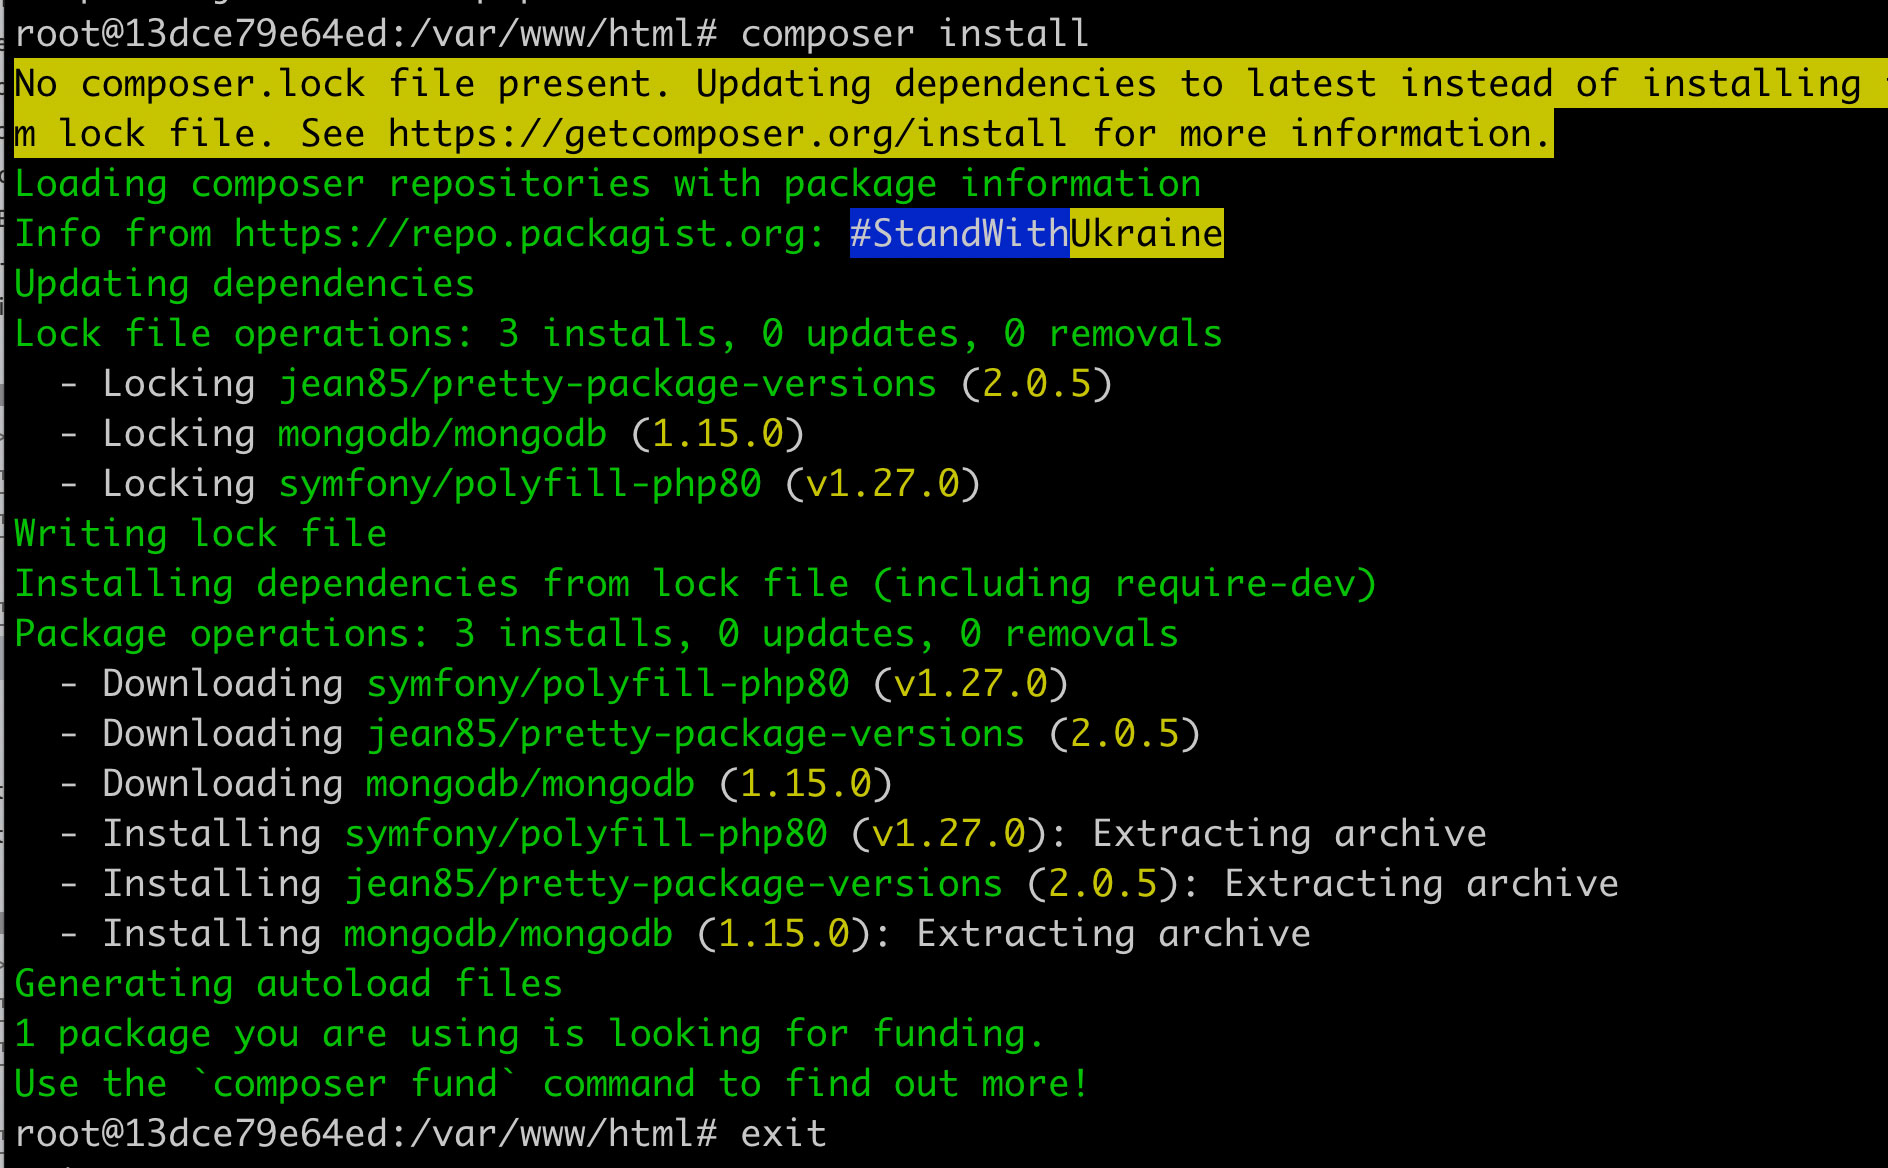
Now we can connect to MongoDB in our PHP application.
Connecting to MongoDB in a PHP application.
Now we slightly modify the index.php script to connect to the database and test data recording.
/app/index.php
<?php

// Enabling Composer Packages
require __DIR__ . '/vendor/autoload.php';

// Get environment variables
$local_conf = getenv();
define('DB_USERNAME', $local_conf['DB_USERNAME']);
define('DB_PASSWORD', $local_conf['DB_PASSWORD']);
define('DB_HOST', $local_conf['DB_HOST']);

// Connect to MongoDB
$db_client = new \MongoDB\Client('mongodb://'. DB_USERNAME .':' . DB_PASSWORD . '@'. DB_HOST . ':27017/');

$db = $db_client->selectDatabase('tutorial');

// Test insert data
for ($page = 1; $page <= 1000; $page++) {

    $data = [
        'page_id' => $page,
        'title' => "Page " . $page,
        'date' => date("m.d.y H:i:s"),
        'timestamp' => time(),
        'mongodb_time' => new MongoDB\BSON\UTCDateTime(time() * 1000)
    ];

    $updateResult = $db->pages->updateOne(
        [
            'page_id' => $page // query
        ],
        ['$set' => $data],
        ['upsert' => true]
    );

    echo $page . " " ;
}
echo '<br/>Finish';
exit;
If we run localhost in the browser, our application will write 1,000 documents from the for loop into the database. It will also display the sequential numbers of the documents being written.
Connecting to MongoDB via MongoDB Compass
MongoDB Compass is a handy desktop application to work with MongoDB. I use it to browse databases and collections and create indexes.
This is a quick way to conveniently look through written data and check errors.
Let’s connect to the database using MongoDB Compass to check that the data is actually written.
You need to use Localhost as host and the user/password from docker-compose.
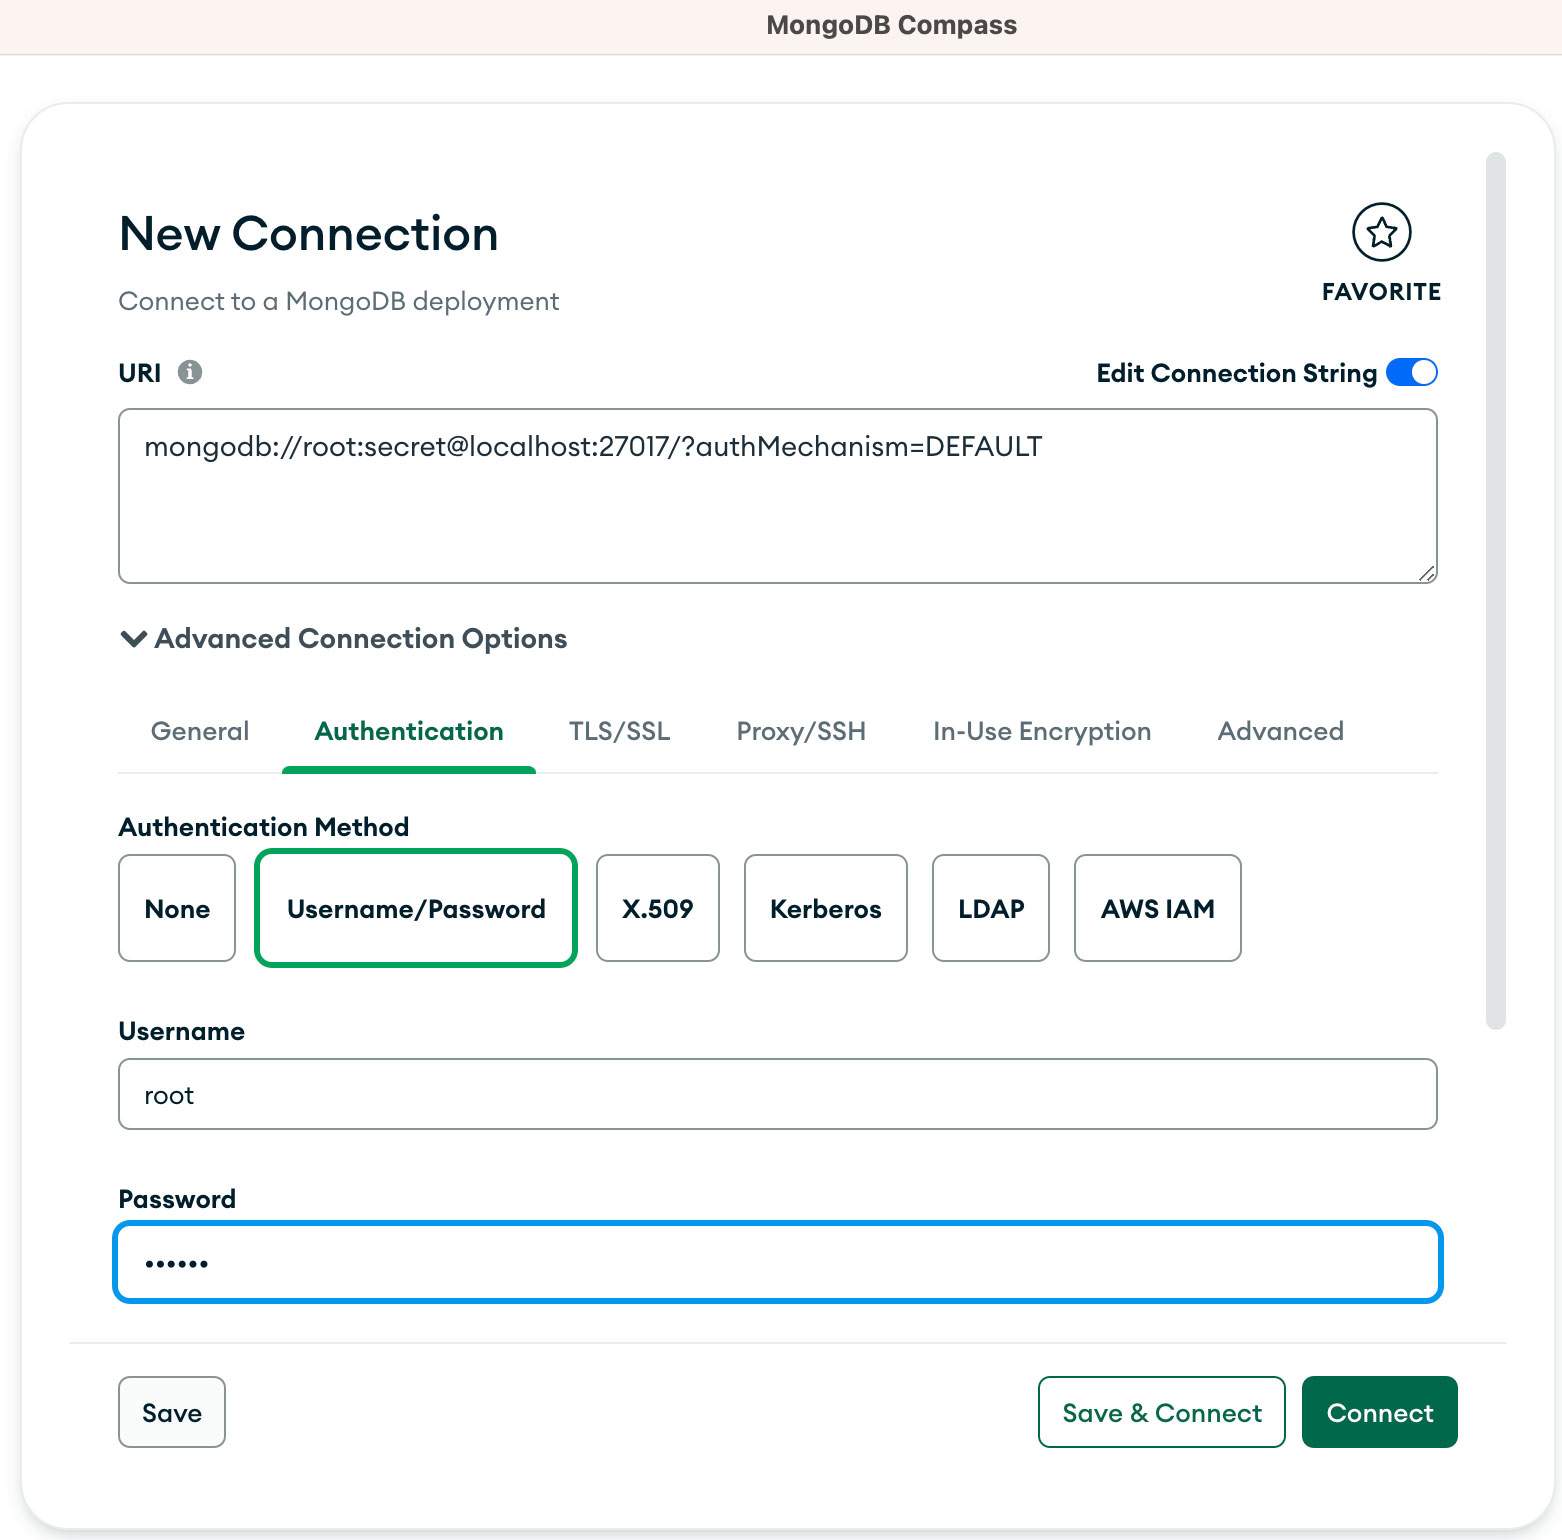
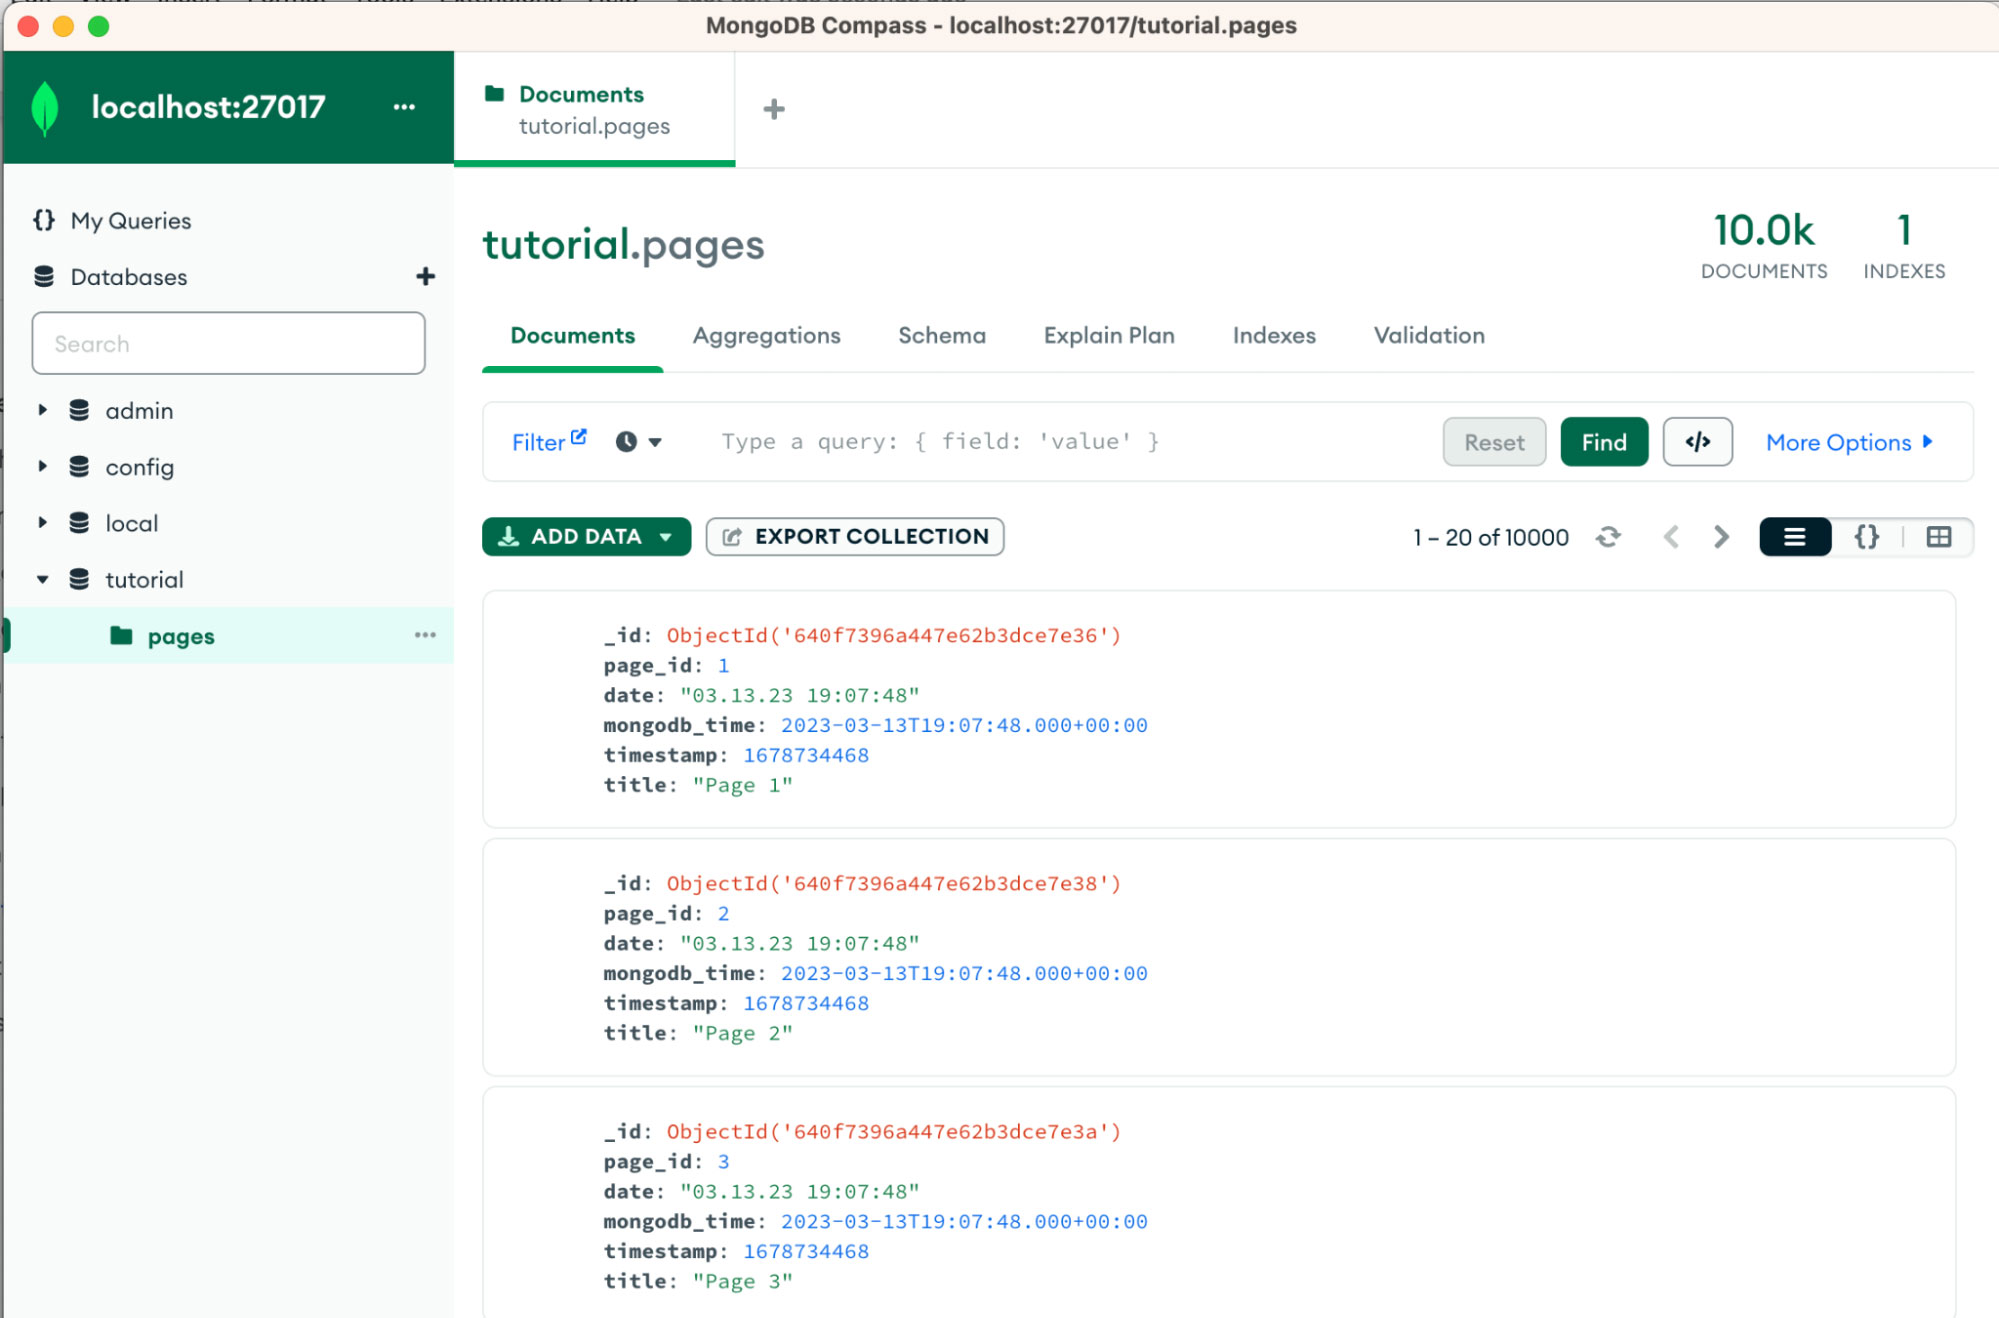
After connecting you will see 1000 documents written to the database and you can make test queries or add an index.
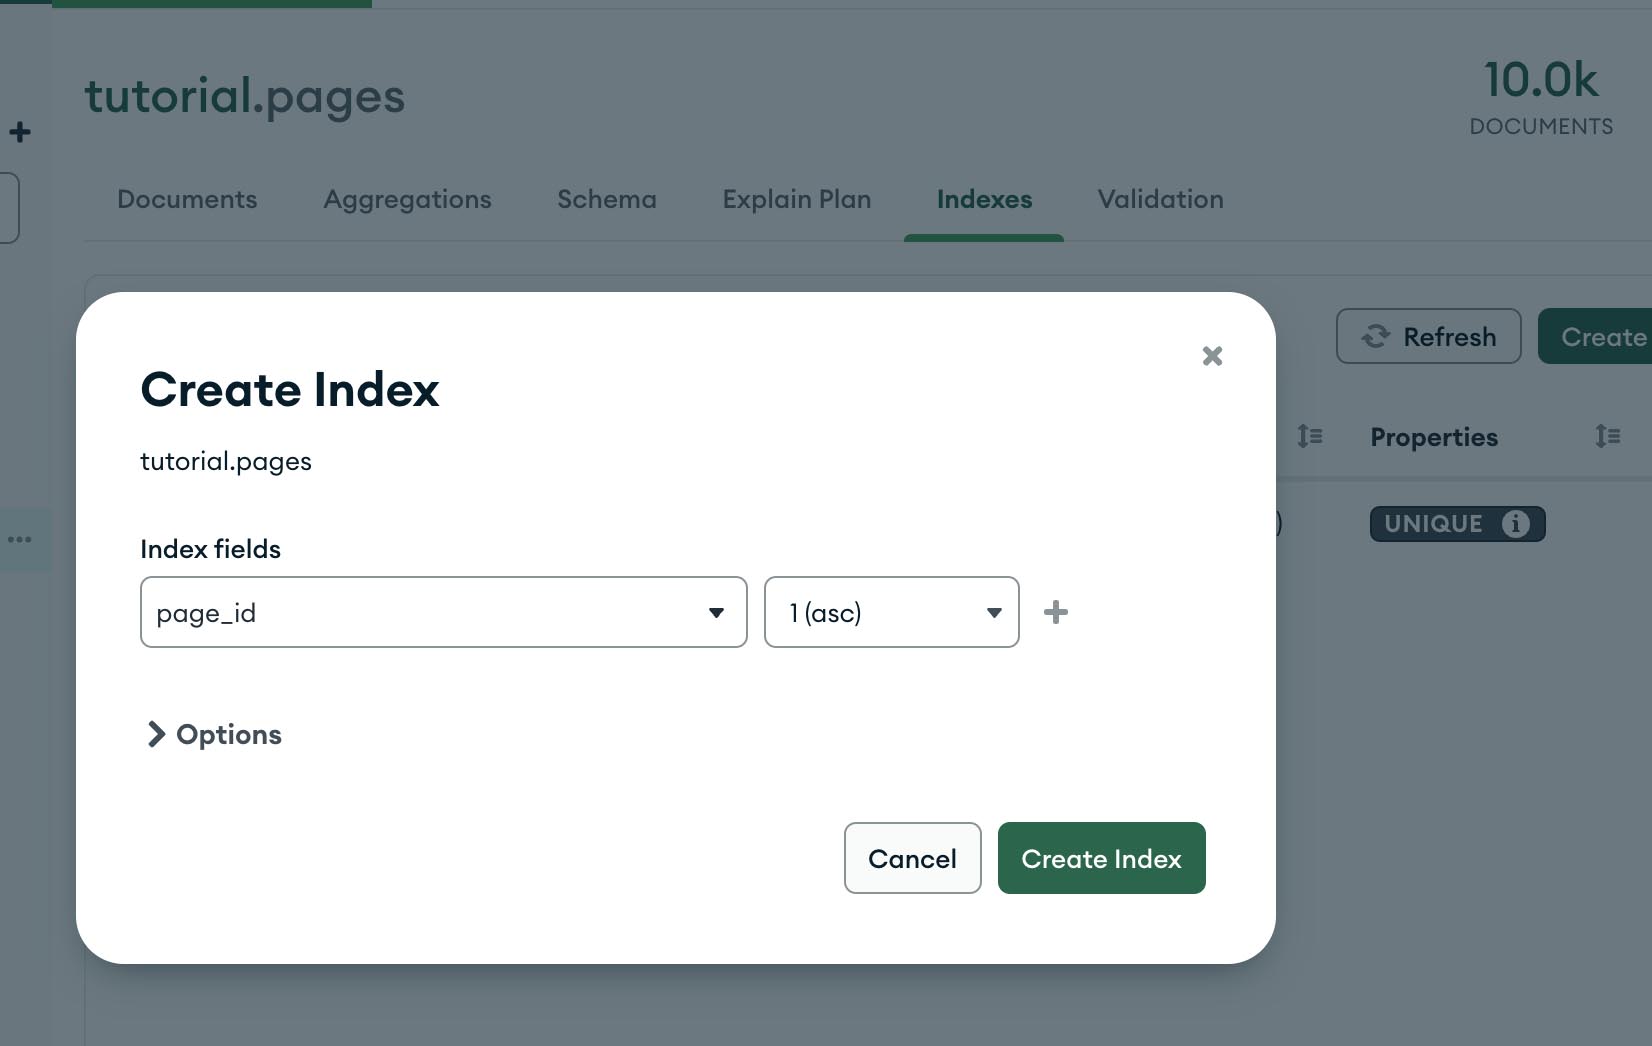
Don’t forget indexes MongoDB
If you write and read data on certain fields, make sure to create indexes on those fields.
For example, if you make 10,000 records with the script we developed above, you will notice a slow writing speed. It could be 20 seconds. But if you create an index on the page field, the write speed will be reduced by a factor of 10 to 2 seconds.
Always create indexes.
This is not hard to do through MongoDB Compass in the Indexes section of the collection.
This is also easy to do in our PHP app, using the method
$db->pages->createIndex(['page_id' => 1]);This will create an index on page_id, because we do insert/upsert with a condition on this field and it is a unique key.
Add it before the for loop, and increase the number of pages to 10k to compare.
// Create an index
$db->pages->createIndex(['page_id' => 1]);

// Test insert data
for ($page = 1; $page <= 10000; $page++) {
This will greatly increase the speed at which the script runs.
Conclusion
We set up an environment and developed a PHP script to work with MongoDB.
In my opinion, it was simple. All the source code you can see and use from my GitHub
To summarize:
- We have now installed standalone Percona Server for MongoDB using Docker-compose locally. However, it is recommended to use ReplicaSet with at least one node for production. We will definitely try this on a separate server using AWS as an example.
- For production applications, it is recommended to use ReplicaSet with several nodes. We will definitely do that too.
- We will install PMM to monitor database, see how our script loads the database, and see database queries with QAN and other PMM features.
In the next posts, I will work on improving the application. I will focus on database customization. You will learn how to improve the application so that it brings practical use, gets data from the GitHub API, and writes to the database. We’ll divide the application into console scripts and Web.
If you are interested in learning more about the PHP application, write in a comment or on the forum. ∎

Discussion
We invite you to our forum for discussion. You are welcome to use the widget below.