
Raspberry Pi Bullseye Percona Server 64bit
I love the Raspberry Pi, and I love Percona server. The combination of the two can provide a nice home database. I have been running a Percona Server database since 2019 to hold all the weather information, that I collect from several of my Weather Stations.
I did a my first blog post on installing Percona Server 5.7 on the Raspberry Pi 3+.
You can read that blog post here: How to Build a Percona Server “Stack” on a Raspberry Pi 3+
Fast forward to 2022 and we now have the resources to build Percona Server 8.0 64-bit on the Raspberry Pi. In this post I will cover building and installing Percona Server 8.0.29 and Percona XtraBackup 8.0.29.
Prereqs:
- Raspberry Pi 3B+, 4 or 400 (any memory size will work).
- 128GB or 256GB microSD card. Of course you can go bigger.
When installing the Raspberry Pi OS on a Pi 4 or 400 make sure to choose the 64-bit image. Install Raspberry Pi OS Bullseye on Raspberry Pi
The Builds
One step I found which will help to increase the speed and success of your build is to add a larger swap file.
Create a new swap file. A 4GB swap file worked just fine. I created the swap file on the / partition.
$ sudo dd if=/dev/zero of=/swapfile4GB bs=1M count=4096
$ sudo mkswap /swapfile4GB
$ sudo swapon /swapfile4GB
$ sudo chmod 0600 /swapfile4GB
You will need to install these additional packages listed below:
$ sudo apt update
$ sudo apt upgrade
$ sudo apt install build-essential pkg-config cmake devscripts debconf debhelper automake bison ca-certificates \
libcurl4-gnutls-dev libaio-dev libncurses-dev libssl-dev libtool libgcrypt20-dev zlib1g-dev lsb-release \
python3-docutils build-essential rsync libdbd-mysql-perl libnuma1 socat librtmp-dev libtinfo5 liblz4-tool \
liblz4-1 liblz4-dev libldap2-dev libsasl2-dev libsasl2-modules-gssapi-mit libkrb5-dev apt-get \
libreadline-dev libudev-dev libev-dev libev4 libprocps-dev
Let’s download Percona Server and some additional tools.
$ wget https://downloads.percona.com/downloads/Percona-Server-LATEST/Percona-Server-8.0.29-21/source/tarball/percona-server-8.0.29-21.tar.gz
$ tar -zxvf percona-server-8.0.29-21.tar.gz
$ wget https://boostorg.jfrog.io/artifactory/main/release/1.77.0/source/boost_1_77_0.tar.gz
$ tar -zxvf boost_1_77_0.tar.gz
$ wget https://downloads.percona.com/downloads/Percona-XtraBackup-LATEST/Percona-XtraBackup-8.0.29-22/source/tarball/percona-xtrabackup-8.0.29-22.tar.gz
$ tar -zxvf percona-xtrabackup-8.0.29-22.tar.gz
Build Percona Server
At the time of writing 8.0.29-21 is the current version. If you have a USB 3 external drive, you might find the build will perform better from that device. In my build I used a 500GB SSD drive.
$ cd percona-server-8.0.29-21
$ mkdir arm64-build
$ cd arm64-build
$ cmake .. -DCMAKE_BUILD_TYPE=Release -DWITH_BOOST=/home/pi/boost_1_77_0 -DCMAKE_INSTALL_PREFIX=/usr/local/mysql
$ sudo make -j2
$ sudo make install
With the 4GB swap file you created above you can use make -j2 for the compile. Depending on which Pi you are using build time should be around 3 hours.
Build XtraBackup
At the time of writing 8.0.29-22 is the current version.
$ cd percona-xtrabackup-8.0.29-22
$ mkdir arm64-build
$ cd arm64-build
$ cmake .. -DCMAKE_BUILD_TYPE=Release -DWITH_BOOST=$HOME/boost_1_77_0 -DCMAKE_INSTALL_PREFIX=/usr/local/xtrabackup
$ sudo make -j3
$ sudo make install
The builds are now complete. Since we created everything from source they are a few last things that need to be done.
We need to create the mysql user and set its home directory. We need to update the /usr/local/mysql to be owned by mysql.
$ sudo useradd mysql -d /usr/local/mysql
$ sudo chown -R mysql:mysql /usr/local/mysql
$ sudo mkdir -p /var/log/mysql
$ sudo chown -R mysql:mysql /var/log/mysql
One last thing we need before to start MySQL for the 1st time is an /etc/my.cnf.
Here is a sample you can work with.
$ sudo vi /etc/my.cnfCopy and paste the contents below into your my.cnf.
[mysqld]
character-set-server = utf8mb4
port = 3306
socket = /usr/local/mysql/mysql.sock
pid-file = /usr/local/mysql/mysqld.pid
basedir = /usr/local/mysql
datadir = /data0/mysql/data
tmpdir  = /data0/mysql/tmp
general_log_file = /var/log/mysql/mysql-general.log
log-error = /var/log/mysql/mysqld.log
slow_query_log_file =/var/log/mysql/slow_query.log
slow_query_log = 0 # Slow query log off
expire_logs_days = 5
log_error_verbosity = 1
lower_case_table_names = 1
max_allowed_packet = 32M
max_connections = 50
max_user_connections = 40
skip-external-locking
skip-name-resolve
table_open_cache=500
thread_cache_size=16
thread_pool_size=16

innodb_data_home_dir = /data0/mysql/data
innodb_log_group_home_dir = /data0/mysql/data
innodb_buffer_pool_size = 2048M
innodb_log_files_in_group = 2
innodb_log_file_size = 128M
innodb_log_buffer_size = 16M
innodb_flush_log_at_trx_commit = 2
innodb_lock_wait_timeout = 50
innodb_flush_method = O_DIRECT
innodb_file_per_table = 1
You will want to set the following setting to match your needs.
- datadir = /your/data/location/
- innodb_data_home_dir = this should match your datadir
- innodb_log_group_home_dir = this should match your datadir
Now you will want to create a mysqld.server service file in /lib/systemd/system
$ sudo vi /lib/systemd/system/mysqld.serviceAdd the below contents to your mysqld.service.
[Unit]
Description=Percona Server 8.0
After=syslog.target
After=network.target
[Install]
WantedBy=multi-user.target
[Service]
User=mysql
Group=mysql
ExecStart=/usr/local/mysql/bin/mysqld --defaults-file=/etc/my.cnf
TimeoutSec=300
WorkingDirectory=/usr/local/mysql
Restart=on-failure
#RestartPreventExitStatus=1
PrivateTmp=true
Let’s setup Percona Server to stop and start with the OS.
$ sudo systemctl enable mysqld.ServiceFinish your build.
Once you have completed all the above steps. You can follow this blog post The lost art of Database Server Initialization.. Start at step 4.
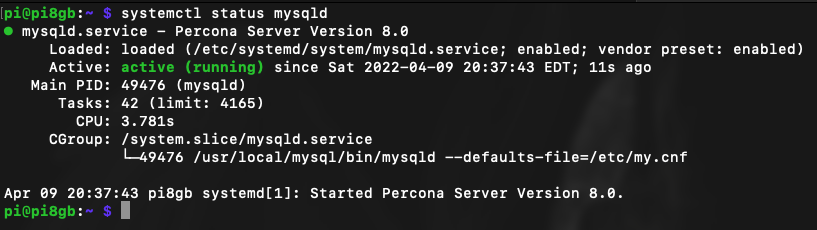
Thats it. You have a new Percona Server 8.0 running on your Raspberry Pi 4.
This process does take some patience, but if you like the Raspberry Pi and
Percona Server this is well worth the time it takes.
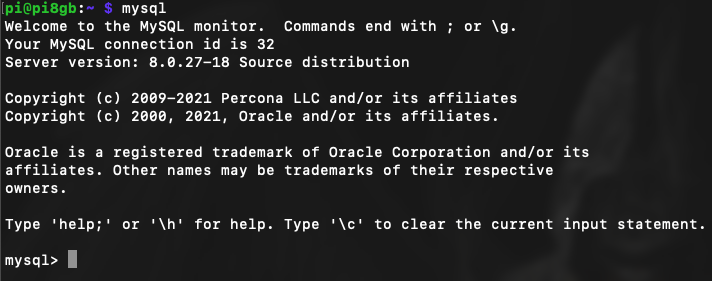
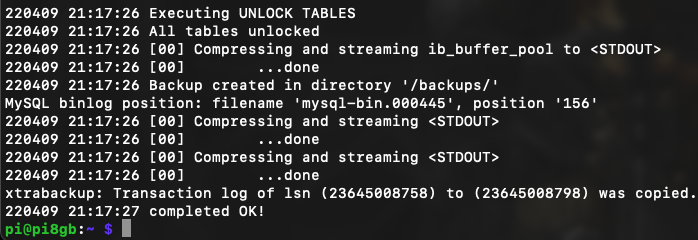
Now for some screen shots.
- Percona Server:
- Command Line Interface:
- XtraBackup complete:

Discussion
We invite you to our forum for discussion. You are welcome to use the widget below.