%22%3E%3Cpath%20d=%22M352.016%20109.322h-18.62v33.317H308.887V31.542h45.54c26.587.0%2042.669%2015.7006%2042.669%2038.4065V70.2514c0%2025.715-20.051%2039.0416-45.051%2039.0416L352.016%20109.322v0zm20.207-38.885C372.223%2059.4847%20364.589%2053.6128%20352.32%2053.6128H333.367V87.5641H352.78c12.27.0%2019.414-7.3081%2019.414-16.8242V70.437H372.223z%22%20fill=%22%23fff%22/%3E%3Cpath%20d=%22M410.776%20142.648V31.542H494.84V53.3001H435.139V75.8497h52.527V97.6078H435.139V120.949h60.494v21.758H410.776V142.648v0z%22%20fill=%22%23fff%22/%3E%3Cpath%20d=%22M582.46%20142.648%20558.588%20107.104H539.331v35.544H514.822V31.542h50.939c26.284.0%2042.032%2013.815%2042.032%2036.6674V68.5123c0%2017.9282-9.702%2029.2128-23.872%2034.4497L611.145%20142.639H582.451L582.46%20142.648zM582.95%2069.4893C582.95%2059.0255%20575.62%2053.603%20563.694%2053.603H539.341V85.5026h24.843C576.12%2085.5026%20582.95%2079.1422%20582.95%2069.8019V69.4991%2069.4893z%22%20fill=%22%23fff%22/%3E%3Cpath%20d=%22M678.058%20145.618c-33.221.0-57.907-25.568-57.907-57.9171V87.3882C620.151%2055.3812%20644.337%2029.1678%20679.048%2029.1678c21.285.0%2034.055%207.0639%2044.54%2017.3616L707.781%2064.6922C699.059%2056.7979%20690.21%2051.9909%20678.891%2051.9909c-19.021.0-32.761%2015.7593-32.761%2035.0652V87.3687c0%2019.3063%2013.397%2035.3683%2032.761%2035.3683C691.788%20122.737%20699.706%20117.588%20708.585%20109.537l15.807%2015.916C712.76%20137.851%20699.863%20145.56%20678.088%20145.56L678.058%20145.618z%22%20fill=%22%23fff%22/%3E%3Cpath%20d=%22M789.963%20145.618c-34.858.0-59.858-25.9-59.858-57.9171V87.3882c0-32.007%2025.333-58.2204%2060.162-58.2204%2034.829.0%2059.858%2025.9007%2059.858%2057.9176V87.398c0%2032.007-25.333%2058.22-60.162%2058.22zm34.212-58.22C824.175%2068.0922%20809.975%2052.03%20789.963%2052.03%20769.952%2052.03%20756.095%2067.7893%20756.095%2087.0951V87.4078C756.095%20106.714%20770.295%20122.776%20790.306%20122.776%20810.318%20122.776%20824.175%20107.017%20824.175%2087.7107V87.398v0z%22%20fill=%22%23fff%22/%3E%3Cpath%20d=%22M985.089%20142.736%201039.93%2029.1678%201094.77%20142.746h-27.5L1039.93%2086.2256l-27.24%2056.5204H985.089V142.736z%22%20fill=%22%23fff%22/%3E%3Cpath%20d=%22M974.936%2031.5811V145.628L891.304%2078.0968V142.551H865.285V29.1678L948.917%2096.4354V31.5811h26.019z%22%20fill=%22%23fff%22/%3E%3C/g%3E%3Cpath%20d=%22M219.315%20146.829c28.718-18.788%2038.114-57.1102%2020.735-87.2301-8.708-15.108-22.784-25.9277-39.624-30.4456-15.602-4.1923-31.898-2.478-46.241%204.7743L134.603.0%2093.9541%2070.4613.0%20233.311H269.206l-49.891-86.482zM195.821%2046.4134c12.241%203.263%2022.427%2011.1294%2028.771%2022.0826%2012.47%2021.5912%205.993%2048.977-14.23%2062.808L163.128%2049.4361c10.176-4.8971%2021.653-5.9652%2032.693-3.0227zM134.603%2035.7593%20238.247%20215.426H177.605L104.268%2088.3409l30.329-52.5762L134.603%2035.7593zM30.9588%20215.426l62.99-109.168L156.939%20215.426H30.9588z%22%20fill=%22url(%23paint0_linear_1391_11470)%22/%3E%3Cpath%20d=%22M306.655%20202.335C306.655%20196.555%20307.958%20191.37%20310.565%20186.78%20313.172%20182.133%20316.713%20178.507%20321.19%20175.9%20325.723%20173.293%20330.738%20171.99%20336.235%20171.99%20342.695%20171.99%20348.333%20173.548%20353.15%20176.665%20357.967%20179.782%20361.48%20184.202%20363.69%20189.925H354.425C352.782%20186.355%20350.402%20183.607%20347.285%20181.68%20344.225%20179.753%20340.542%20178.79%20336.235%20178.79%20332.098%20178.79%20328.387%20179.753%20325.1%20181.68%20321.813%20183.607%20319.235%20186.355%20317.365%20189.925%20315.495%20193.438%20314.56%20197.575%20314.56%20202.335%20314.56%20207.038%20315.495%20211.175%20317.365%20214.745%20319.235%20218.258%20321.813%20220.978%20325.1%20222.905%20328.387%20224.832%20332.098%20225.795%20336.235%20225.795%20340.542%20225.795%20344.225%20224.86%20347.285%20222.99%20350.402%20221.063%20352.782%20218.315%20354.425%20214.745H363.69C361.48%20220.412%20357.967%20224.803%20353.15%20227.92%20348.333%20230.98%20342.695%20232.51%20336.235%20232.51%20330.738%20232.51%20325.723%20231.235%20321.19%20228.685%20316.713%20226.078%20313.172%20222.48%20310.565%20217.89%20307.958%20213.3%20306.655%20208.115%20306.655%20202.335zm130.259%2030.26C431.418%20232.595%20426.403%20231.32%20421.869%20228.77%20417.336%20226.163%20413.738%20222.565%20411.074%20217.975%20408.468%20213.328%20407.164%20208.115%20407.164%20202.335S408.468%20191.37%20411.074%20186.78C413.738%20182.133%20417.336%20178.535%20421.869%20175.985%20426.403%20173.378%20431.418%20172.075%20436.914%20172.075%20442.468%20172.075%20447.511%20173.378%20452.044%20175.985%20456.578%20178.535%20460.148%20182.105%20462.754%20186.695%20465.361%20191.285%20466.664%20196.498%20466.664%20202.335%20466.664%20208.172%20465.361%20213.385%20462.754%20217.975%20460.148%20222.565%20456.578%20226.163%20452.044%20228.77%20447.511%20231.32%20442.468%20232.595%20436.914%20232.595zm0-6.715C441.051%20225.88%20444.763%20224.917%20448.049%20222.99%20451.393%20221.063%20453.999%20218.315%20455.869%20214.745%20457.796%20211.175%20458.759%20207.038%20458.759%20202.335%20458.759%20197.575%20457.796%20193.438%20455.869%20189.925%20453.999%20186.355%20451.421%20183.607%20448.134%20181.68%20444.848%20179.753%20441.108%20178.79%20436.914%20178.79%20432.721%20178.79%20428.981%20179.753%20425.694%20181.68%20422.408%20183.607%20419.801%20186.355%20417.874%20189.925%20416.004%20193.438%20415.069%20197.575%20415.069%20202.335%20415.069%20207.038%20416.004%20211.175%20417.874%20214.745%20419.801%20218.315%20422.408%20221.063%20425.694%20222.99%20429.038%20224.917%20432.778%20225.88%20436.914%20225.88zm134.906-52.7V232H564.085V188.14L544.535%20232H539.095L519.46%20188.055V232H511.725V173.18H520.055L541.815%20221.8l21.76-48.62H571.82zm108.063.0V232H672.148V188.14L652.598%20232H647.158l-19.635-43.945V232H619.788V173.18H628.118l21.76%2048.62%2021.76-48.62H679.883zM735.416%20172.755V210.24C735.416%20215.51%20736.691%20219.42%20739.241%20221.97%20741.848%20224.52%20745.446%20225.795%20750.036%20225.795%20754.57%20225.795%20758.111%20224.52%20760.661%20221.97%20763.268%20219.42%20764.571%20215.51%20764.571%20210.24V172.755H772.306v37.4C772.306%20215.085%20771.315%20219.25%20769.331%20222.65%20767.348%20225.993%20764.656%20228.487%20761.256%20230.13%20757.913%20231.773%20754.145%20232.595%20749.951%20232.595%20745.758%20232.595%20741.961%20231.773%20738.561%20230.13%20735.218%20228.487%20732.555%20225.993%20730.571%20222.65%20728.645%20219.25%20727.681%20215.085%20727.681%20210.155v-37.4H735.416zM866.64%20232H858.905l-31.11-47.175V232H820.06V172.67H827.795l31.11%2047.09V172.67H866.64V232zm55.77-59.245V232H914.675V172.755H922.41zm84.5.0V179.045H990.758V232H983.023V179.045H966.788V172.755h40.122zm85.85.0-19.3%2036.89V232H1065.73V209.645L1046.35%20172.755H1054.93L1069.55%20202.76%201084.17%20172.755H1092.76z%22%20fill=%22%23fff%22/%3E%3Cdefs%3E%3ClinearGradient%20id=%22paint0_linear_1391_11470%22%20x1=%2230.363%22%20y1=%22238.463%22%20x2=%22230.327%22%20y2=%2238.6685%22%20gradientUnits=%22userSpaceOnUse%22%3E%3Cstop%20stop-color=%22%23fc3519%22/%3E%3Cstop%20offset=%221%22%20stop-color=%22%23f0d136%22/%3E%3C/linearGradient%3E%3CclipPath%20id=%22clip0_1391_11470%22%3E%3Crect%20width=%22962.614%22%20height=%22116.656%22%20fill=%22%23fff%22%20transform=%22translate(132.155%2028.9724)%22/%3E%3C/clipPath%3E%3C/defs%3E%3C/svg%3E)
Before deploying Percona Monitoring and Management (PMM) in production, you might want to test it or set up a development instance locally. Since many developers and DBAs have Windows desktops, I wanted to demonstrate how to set up PMM on Windows for an easy test environment. In this post, I’ll walk you through setting up PMM with Docker and WSL.
If you’re a Linux user, check the blog post I wrote on Setting up PMM for monitoring MySQL in a local environment. There you can find instructions for installing Percona Monitoring and Management (PMM) on Linux and how to set it up for monitoring a MySQL instance. Otherwise, continue reading to get PMM up and running on Windows.
Getting Started With PMM on Windows
If you’re a Windows user and want to try PMM, the recommended way for installing both the server and client would be to use the official Docker images and follow these guides:
Before running the commands in those guides, you should install Docker Desktop and Windows Subsystem for Linux (WSL). These instructions should work for users who are on current versions of Windows 10 and Windows 11. For installing WSL, follow the instructions on the Microsoft Learn website. Then, get the Docker Desktop installer. Now you’re ready to install and configure PMM.
PMM Server
As stated in the documentation, you can store data from your PMM in:
- Docker volume (Preferred method)
- Data container
- Host directory
The preferred method is also recommended for Windows. Open PowerShell and execute the instructions in the Run Docker with volume section. I’ve reproduced the steps here to save you time:
- Get the Docker image:
$ docker pull percona/pmm-server:2
- Create a volume:
$ docker volume create pmm-data
- Run the image:
$ docker run --detach --restart always \
--publish 443:443 \
-v pmm-data:/srv \
--name pmm-server \
percona/pmm-server:2
- Change the password for the default
adminuser:
$ docker exec -t pmm-server change-admin-password <new_password>
Once PMM Server is installed, open the browser and visit https://localhost. You will see the PMM login screen.
Now that the server is up and running, you need to get its IP address before connecting the client to the server. To get the IP address, you need the name or container ID. You can get it by running:
$ docker ps
The docker ps command will give you a list of the containers running on your system, as follows:
CONTAINER ID   IMAGE                                COMMAND                  CREATED        STATUS                    PORTS                          NAMES
fd988ad761aa   percona/pmm-server:2                 "/opt/entrypoint.sh"     2 months ago   Up 11 minutes (healthy)   80/tcp, 0.0.0.0:443->443/tcp   pmm-server
Take note of the container ID or name of the PMM Server container. Then, execute this command:
$ docker inspect -f '{{range.NetworkSettings.Networks}}{{.IPAddress}}{{end}}' your_container
Replacing your_container with the container ID or name copied previously.
PMM Client
Go to the Set Up PMM Client section in the documentation and follow the first two steps. All of these commands are executed from PowerShell.
In Step 3, you need to specify the IP address of the PMM Server by setting up the PMM_SERVER environment variable:
$ $env:PMM_SERVER=’X.X.X.X:443’
Replacing X.X.X.X with the server’s IP address. Then, initialize the container:
$ docker run \
--rm \
--name pmm-client \
-e PMM_AGENT_SERVER_ADDRESS=$env:PMM_SERVER \
-e PMM_AGENT_SERVER_USERNAME=admin \
-e PMM_AGENT_SERVER_PASSWORD=admin \
-e PMM_AGENT_SERVER_INSECURE_TLS=1 \
-e PMM_AGENT_SETUP=1 \
-e PMM_AGENT_CONFIG_FILE=config/pmm-agent.yaml \
--volumes-from pmm-client-data \
percona/pmm-client:2
PMM_AGENT_SERVER_PASSWORD default value is admin. Replace this value with the password assigned when the server was configured.
Configure Your Database
Now that the client is connected to the server, you must configure PMM for monitoring your database. Follow the instructions below.
- MySQL
- PostgreSQL
- MongoDB
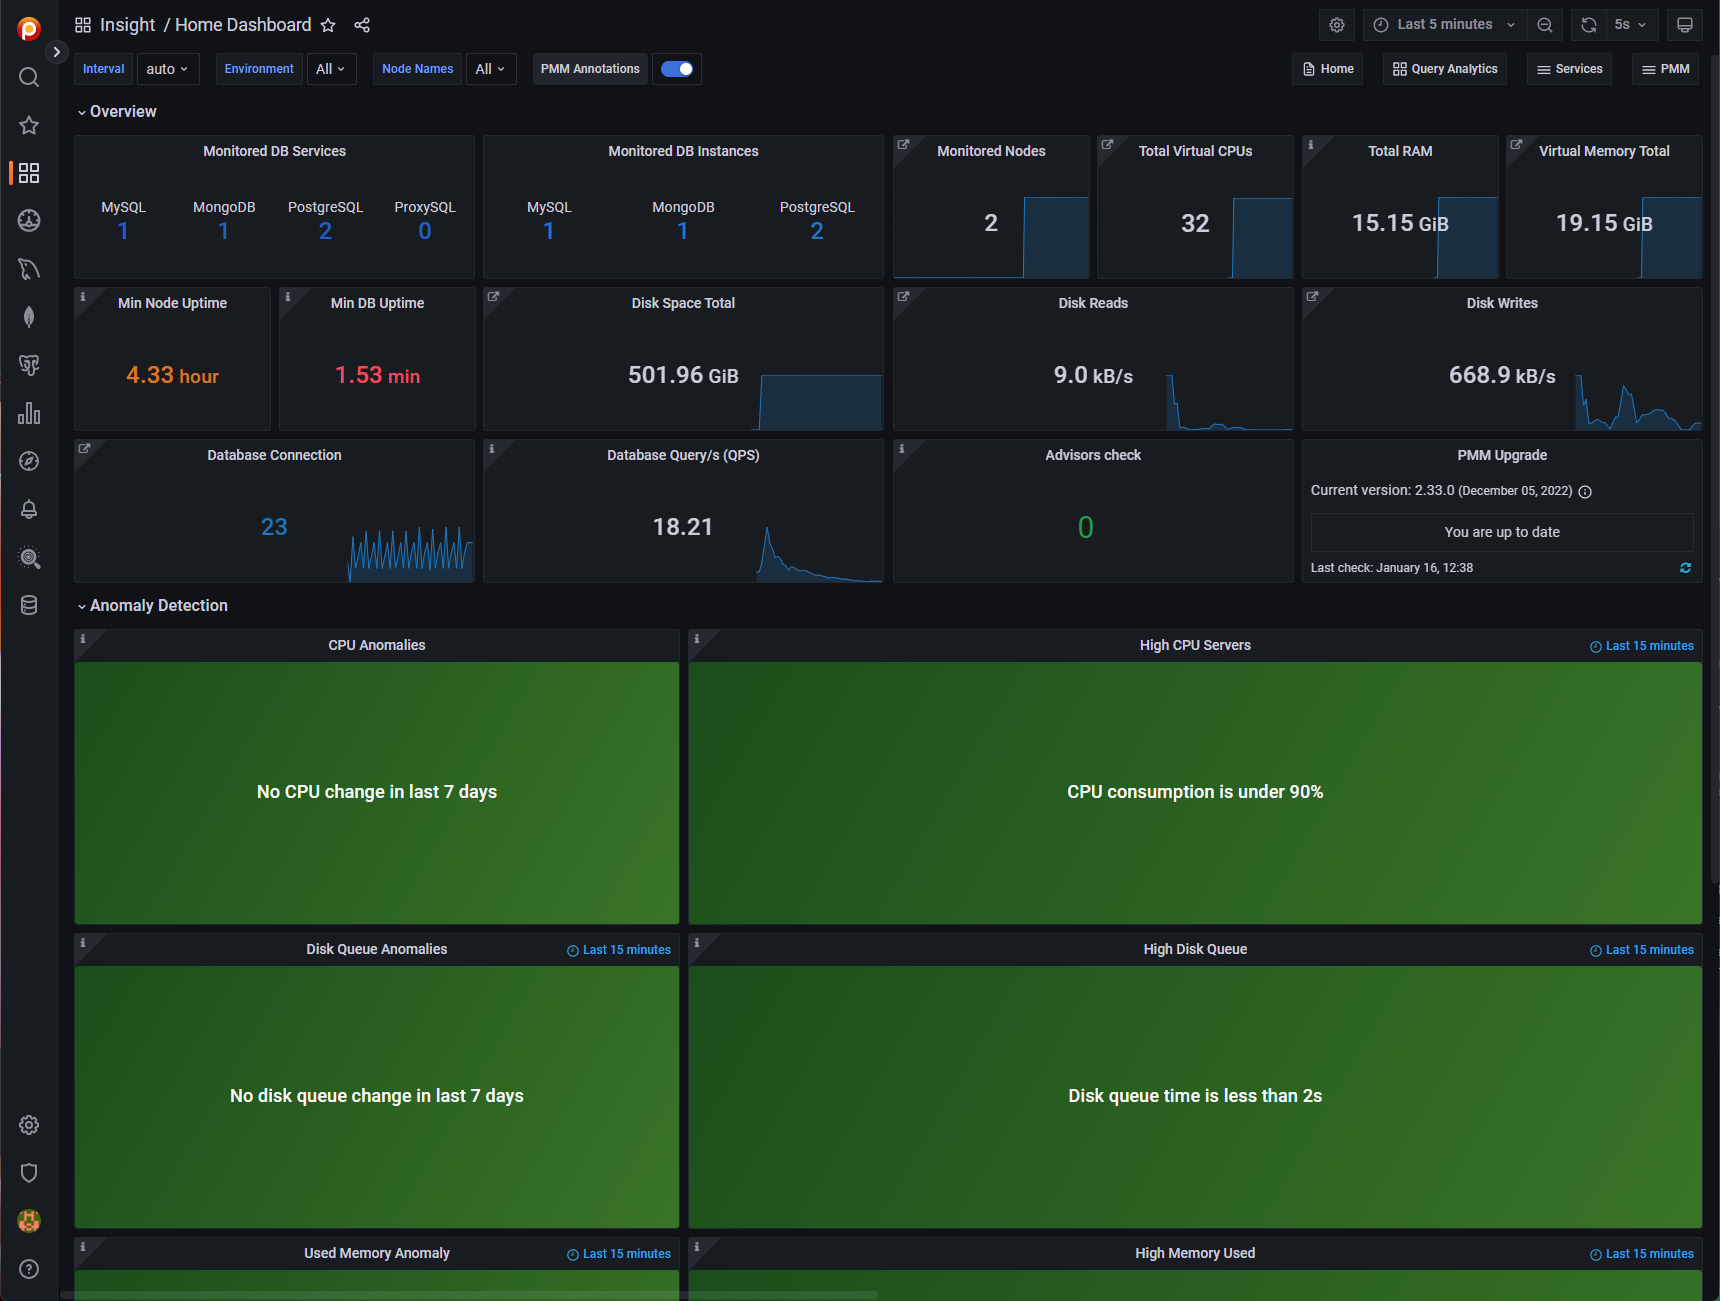
Once PMM is configured, the Home Dashboard will show the databases that are being monitored. For more information and advanced configuration, check the documentation.
MySQL Installation
If you already have a MySQL instance running, skip the installation process and continue with the configuration.
On Windows, you can install Percona Server for MySQL on Ubuntu running under WSL, but it’s better to use the official Docker image, as the MySQL server would be running on the same network as PMM.
For installing MySQL using Docker, follow the instructions in the Percona Server for MySQL documentation.
You need to start the container with the latest version of Percona Server for MySQL 8.0:
$ docker run -d \
  --name ps \
  -e MYSQL_ROOT_PASSWORD=root \
  percona/percona-server:8.0
Where ps is the name of the container, and the default password for the root user is root. You can change these values according to your needs.
MySQL Configuration
Once Percona Server for MySQL is running, you need to get its IP address by running:
$ docker ps
CONTAINER ID   IMAGE                                COMMAND                  CREATED         STATUS                   PORTS                          NAMES
1fb4ddb35e48   percona/pmm-client:2                 "/usr/local/percona/…"   2 minutes ago   Up 2 minutes                                            pmm-client
Copy the container ID or name of the Percona Server for MySQL container. Then, execute this command:
$ docker inspect -f '{{range.NetworkSettings.Networks}}{{.IPAddress}}{{end}}' your_container
Replacing your_container with the value you copied previously.
The IP address of the PMM Client container is also needed.
For configuring PMM for monitoring MySQL, we need to create a PMM user. First, log into MySQL:
$ docker run -it --rm percona mysql -h MYSQL_SERVER -uroot -p
Where MYSQL_SERVER is the IP address of the Percona Server for MySQL container
Then, execute the following SQL statements
CREATE USER 'pmm'@'localhost' IDENTIFIED BY 'pass' WITH MAX_USER_CONNECTIONS 10;
GRANT SELECT, PROCESS, SUPER, REPLICATION CLIENT, RELOAD, BACKUP_ADMIN ON *.* TO 'pmm'@'localhost';
Replacing pass with your desired password, and localhost with the IP address of the PMM Client container.
And finally, register the MySQL server for monitoring:
$ docker exec pmm-client pmm-admin add mysql --username=pmm --password=pass --host MYSQL_SERVER --query-source=perfschema
Where MYSQL_SERVER is the IP address of the Percona Server for MySQL container. Replace this value with the IP address and replace pass with the password of your pmm user.
PostgreSQL Installation
If you already have a PostgreSQL instance running, skip the installation process and continue with the configuration.
On Windows, you can install PostgreSQL using the Windows installer or install it on Ubuntu running under WSL, but it’s better to install it using the official image provided by the PostgreSQL project.
You need to start the container with the latest version of PostgreSQL:
$ docker run --name postgres -e POSTGRES_PASSWORD=password -d postgres
Where password is the password for the default postgres user. Replace this value according to your needs.
PostgreSQL Configuration
Once PostgreSQL is running, you need to get its IP address by running:
$ docker ps
CONTAINER ID   IMAGE                                COMMAND                  CREATED          STATUS                    PORTS                          NAMES
0460c671db12   postgres                             "docker-entrypoint.s…"   6 days ago       Up 48 seconds             5432/tcp                       postgres
Copy the container ID or name of the PostgreSQL container. Then, execute this command:
$ docker inspect -f '{{range.NetworkSettings.Networks}}{{.IPAddress}}{{end}}' your_container
Replacing your_container with the value you copied previously.
The IP address of the PMM Client container is also needed.
For configuring PMM for monitoring PostgreSQL, we need to create a PMM user. First, log into PostgreSQL:
$ docker exec -it postgres psql --user postgres
Then, execute the following SQL statement:
CREATE USER pmm WITH SUPERUSER ENCRYPTED PASSWORD '<password>';
Replacing <password> with your desired password.
And finally, register the PostgreSQL server for monitoring:
$ docker exec pmm-client pmm-admin add postgresql --username=pmm --password=pass --host POSTGRESQL_SERVER --query-source=perfschema
Where POSTGRESQL_SERVER is the IP address of the PostgreSQL container. Replace this value with the IP address and replace pass with the password of your pmm user.
MongoDB Installation
If you already have a MongoDB instance running, skip the installation process and continue with the configuration.
On Windows, you can install Percona Server for MongoDB on Ubuntu running under WSL, but it’s better to use the official Docker image, as the MongoDB server would be running on the same network as PMM.
For installing MongoDB using Docker, follow the instructions in the Percona Server for MongoDB documentation.
You need to start the container with the latest version of Percona Server for MongoDB 6.0:
$ docker run --name psmdb -d percona/percona-server-mongodb:6.0
MongoDB Configuration
Once Percona Server for MongoDB is running, you need to get its IP address by running.
$ docker ps
CONTAINER ID   IMAGE                                COMMAND                  CREATED          STATUS                    PORTS                          NAMES
2c3d291535b3   percona/percona-server-mongodb:6.0   "/entrypoint.sh mong…"   6 days ago       Up 27 minutes             27017/tcp                      psmdb
Copy the container ID or name of the Percona Server for MongoDB container. Then, execute this command:
$ docker inspect -f '{{range.NetworkSettings.Networks}}{{.IPAddress}}{{end}}' your_container
Replacing your_container with the value you copied previously.
The IP address of the PMM Client container is also needed.
For configuring PMM for monitoring MongoDB, we need to create a PMM user. First, connect to the admin database in MongoDB using the MongoDB Shell (mongosh):
$ docker run -it --link psmdb --rm percona/percona-server-mongodb:6.0 mongosh mongodb://MONGODB_SERVER:27017/admin
Where MONGODB_SERVER is the IP address of your MongoDB server.
Then, create the user for PMM, executing the following instructions:
db.createRole({
   "role":"explainRole",
   "privileges":[
      {
         "resource":{
            "db":"",
            "collection":""
         },
         "actions":[
            "collStats",
            "dbHash",
            "dbStats",
            "find",
            "listIndexes",
            "listCollections"
         ]
      }
   ],
   "roles":[]
})
db.getSiblingDB("admin").createUser({
   "user":"pmm",
   "pwd":"<password>",
   "roles":[
      {
         "role":"explainRole",
         "db":"admin"
      },
      {
         "role":"clusterMonitor",
         "db":"admin"
      },
      {
         "role":"read",
         "db":"local"
      }
   ]
})
Replacing <password> with the password you want to assign to the pmm user.
And finally, register the MongoDB server for monitoring:
$ docker exec pmm-client pmm-admin add mongodb --username=pmm --password=pass --host MONGODB_SERVER
Where MONGODB_SERVER is the IP address of the MongoDB container. Replace this value with the IP address and replace pass with the password of your pmm user. ∎


Discussion
We invite you to our forum for discussion. You are welcome to use the widget below.